|
Author
|
Topic: 1:32 Apollo Lunar Module 3D-printed model
|
David C
Member Posts: 1014
From: Lausanne
Registered: Apr 2012
|
 posted 02-23-2016 09:18 AM
  
That looks like the work of some super-villain who's shrunk a LM with his ray gun and stolen it. "The agency" will be after you.There is absolutely no chance that my build will resemble this. |
bdipaolo
Member Posts: 89
From:
Registered: Oct 2010
|
 posted 02-23-2016 01:01 PM
  
Awesomely unbelievable! |
Lunokhod 2
Member Posts: 89
From: France
Registered: Sep 2010
|
 posted 02-23-2016 02:36 PM
   
I'm sure your built can resemble this. It looks nice because it is super detailed which is something apparently more achievable with 3D printing than with plastic injection. Remember this is not a scratch-built model, it is a indeed a kit. Thanks for all your comments. |
mode1charlie
Member Posts: 1169
From: Honolulu, HI
Registered: Sep 2010
|
 posted 02-23-2016 03:20 PM
   
That is absolutely amazing. |
Chuckster01
Member Posts: 873
From: Orlando, FL
Registered: Jan 2014
|
 posted 02-23-2016 05:39 PM
   
The detail is amazing. Truly a work of art. |
Norman.King
Member Posts: 375
From: Herne Bay, Kent, UK
Registered: Feb 2010
|
 posted 02-24-2016 11:35 AM
   
That's beyond brilliant, can't say anything else  |
Daugherty54
Member Posts: 591
From: Cabot, Arkansas, USA
Registered: Sep 2010
|
 posted 02-27-2016 10:15 AM
   
I have got to make a list and figure out the costs for this! It might be out of my range but wow! This is incredible! |
Space Cadet Carl
Member Posts: 199
From: Lake Orion, Michigan
Registered: Feb 2006
|
 posted 02-28-2016 04:20 PM
   
I've been casually following the progress on this build and I'm totally astounded at what I'm seeing. |
moonguyron
Member Posts: 191
From: Trinity, FL USA
Registered: Jan 2011
|
 posted 02-28-2016 08:24 PM
   
I realize we are not to covet. However Vincent with the introduction of your LM you are making that very difficult. This is the most accurate, most detailed LM I have seen. I have not figured out how you get all the detail of all the fasteners on the exterior. And the interior looks like the inside of a full scale simulator. I have a bit of experience from Shapeways of their material you used but found it to be too grainy. You seem to have overcome that somehow. I assume the parts in Frosted Ultra Detail might be too expensive? Anyway it is a beauty and the choice of different scales is an added benefit. I would love the 1:16th scale. |
Lunokhod 2
Member Posts: 89
From: France
Registered: Sep 2010
|
 posted 03-01-2016 02:32 AM
   
It is true that the white strong and flexible material is a bit grainy and difficult to sand (you can sand it once you have applied some primer and/or putty and I got quite good results with the engine bells for instance) but that is not too important since the LM is entirely covered with aluminum panels and in the case of the model paper panels. The Frosted ultra or extreme detail material is really perfect for fine parts although very fragile, I broke several parts myself but repairing them with superglue seems to work well. The details on these parts can be much accurate that what you could have with injected plastic. The reason for accuracy is also that when designing the parts on Rhino you have a big screen and you want to design them as accurate as possible. Since I have AMS (advanced modelling syndrome), I have a tendency to make it too accurate until I realized that rivets will only be visible with magnifying glasses. |
moonguyron
Member Posts: 191
From: Trinity, FL USA
Registered: Jan 2011
|
 posted 03-03-2016 01:37 PM
   
Vincent, am I correct to conclude that the exterior panels with all their detail are in fact paper panels that you designed and printed for the LM? And then attached to the outside skin of the model? And if so would it be possible for you to provide, for a fee, a set of panels to anyone who might buy the parts for the LM, whatever the scale? |
Lunokhod 2
Member Posts: 89
From: France
Registered: Sep 2010
|
 posted 03-04-2016 07:00 AM
   
The panels are already provided on my website and were designed with Rhino 3D. For each ascent stage section you have a link to "coating pattern" in A4 and US letter format for 1/32 and 1/24 scales. What you have to do is just to print the pdf files, use a satin varnish for the black panel and a gloss varnish for the anodized aluminium panel. For the aluminium pattern use the pattern as a pattern to cut the panel. |
Lunokhod 2
Member Posts: 89
From: France
Registered: Sep 2010
|
 posted 05-12-2016 09:32 AM
   
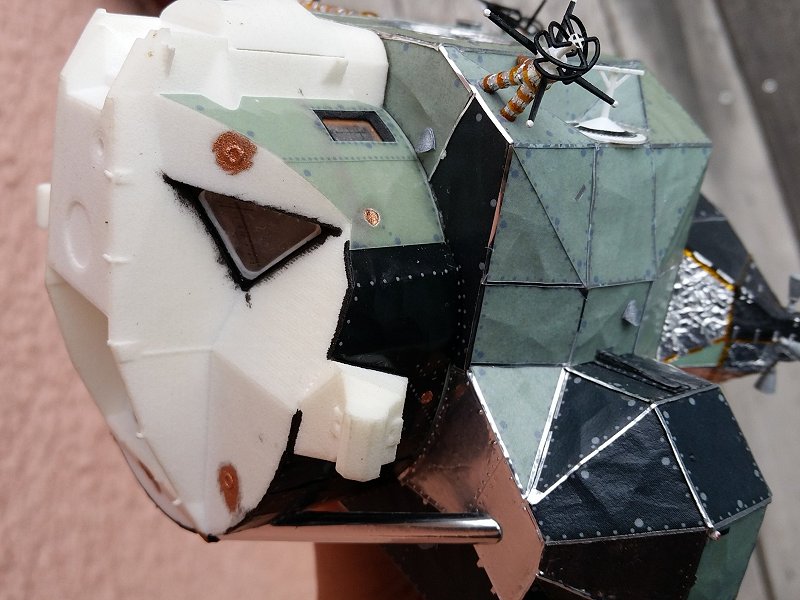
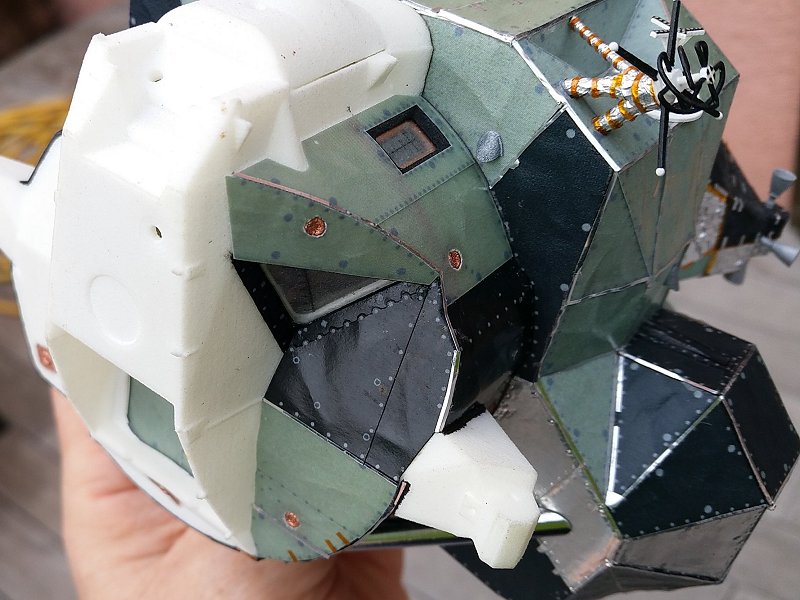
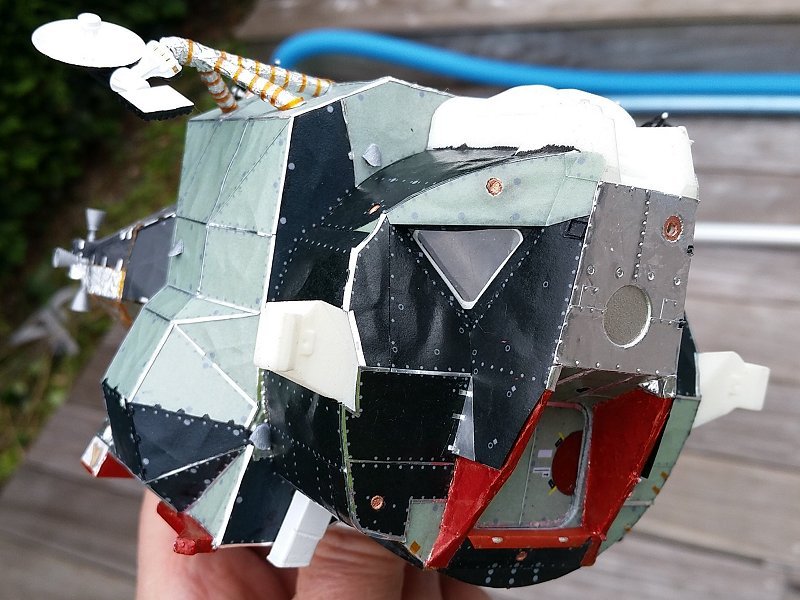
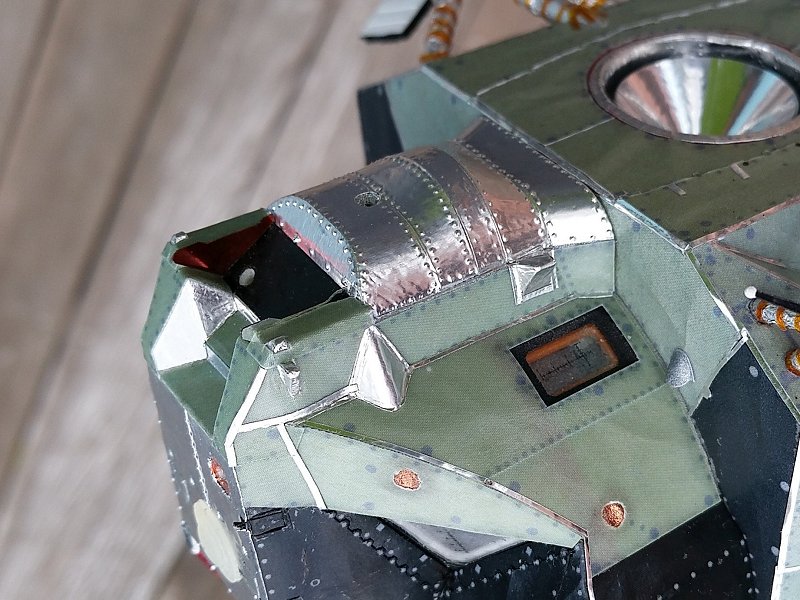
All panels on the LM ascent stage are now in place. The last work item was to assemble all the panels on the forward section. There were more than 100 different panels to assemble. Since the model was designed in 3D it allowed for all surfaces to be developed and then very precise drawings could be made that fitted exactly with the model.Next item will be to complete the details of the forward section and then the LM itself will be finished, maybe this weekend. Will follow the lunar base and design of the Monogram CSM support above the LM. 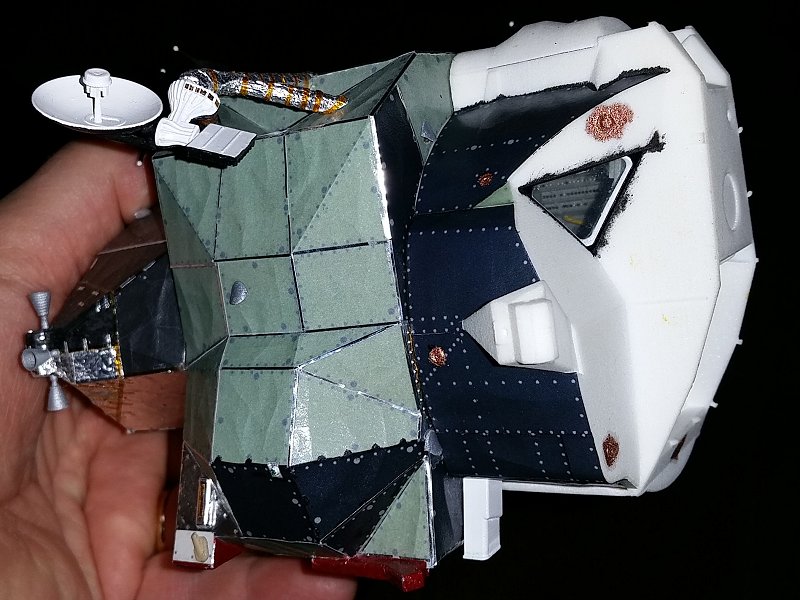 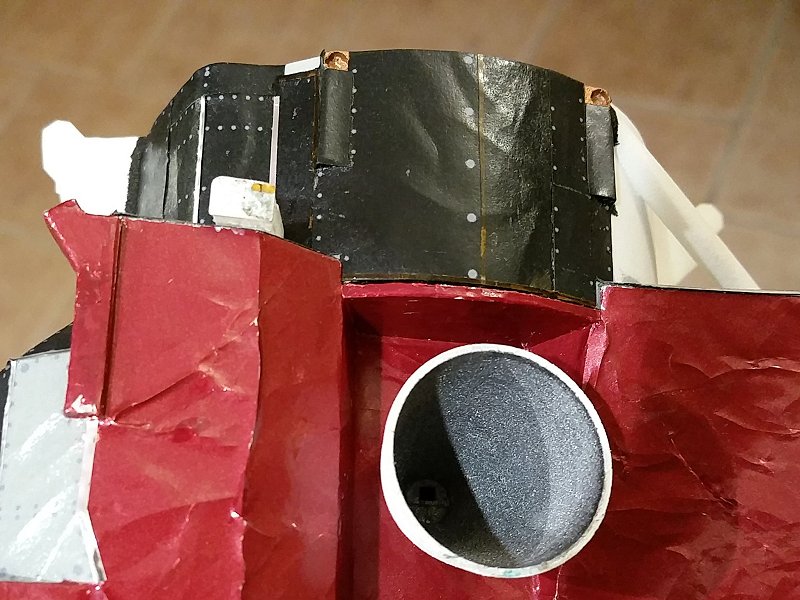
|
Lunokhod 2
Member Posts: 89
From: France
Registered: Sep 2010
|
 posted 05-12-2016 09:34 AM
   
The rest of the pictures: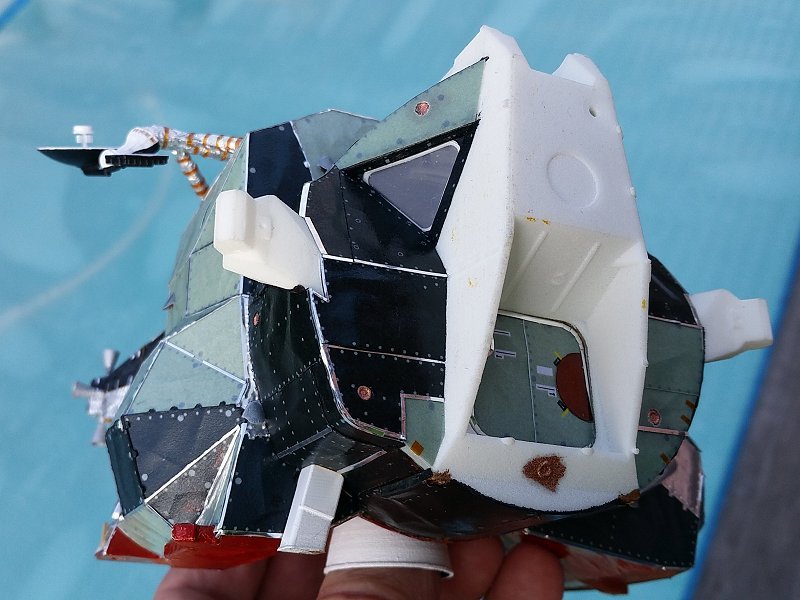 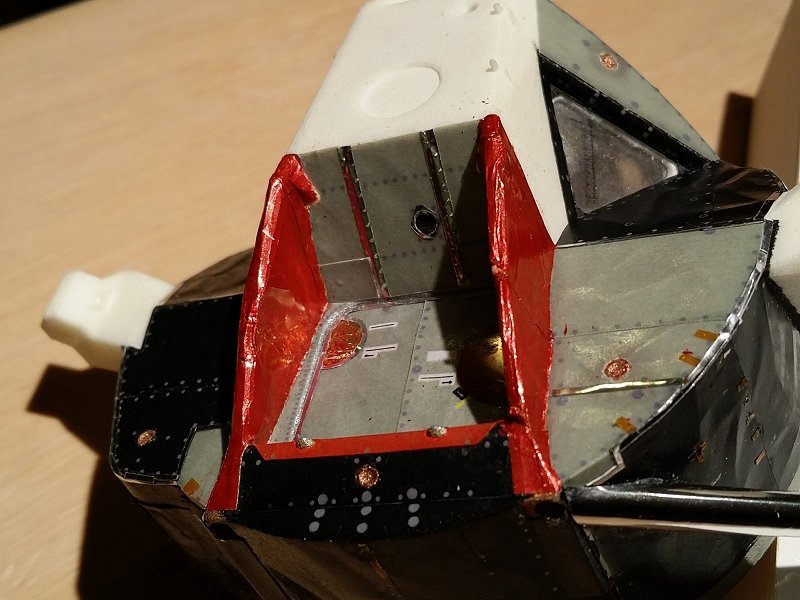
|
Lunokhod 2
Member Posts: 89
From: France
Registered: Sep 2010
|
 posted 05-12-2016 09:39 AM
   
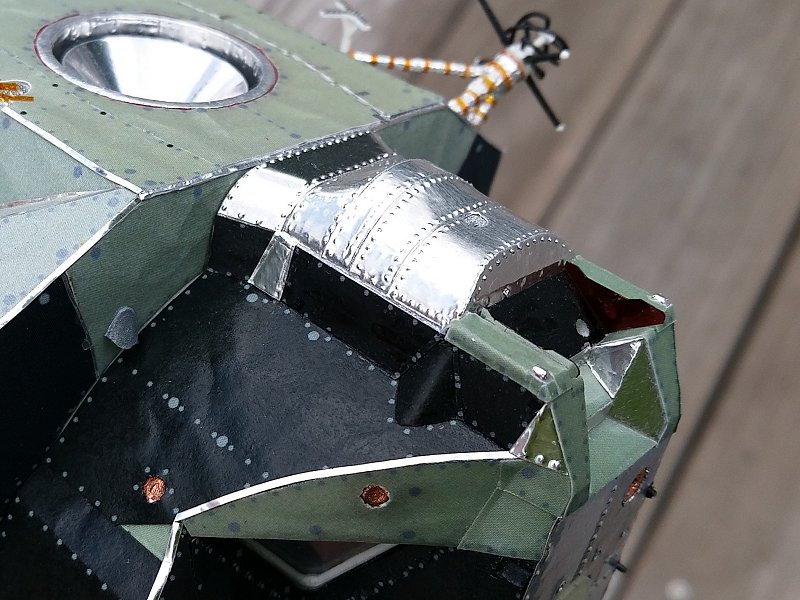 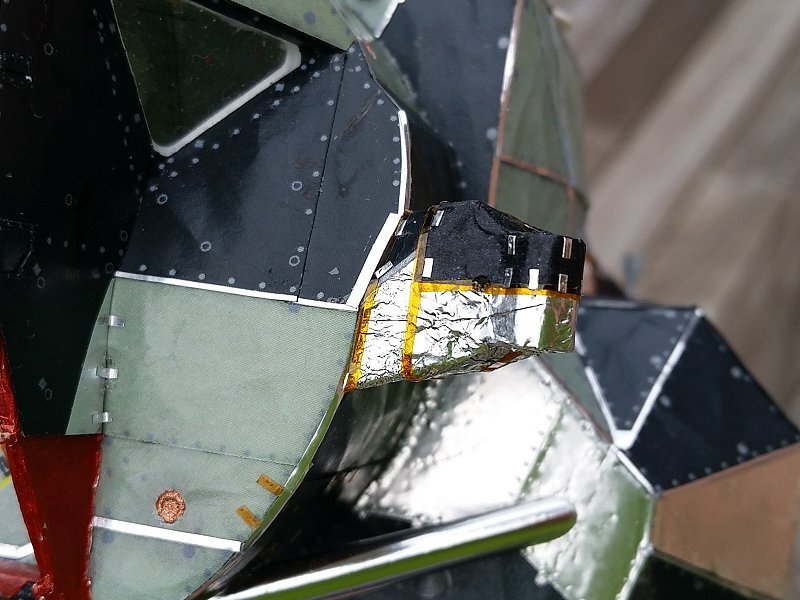
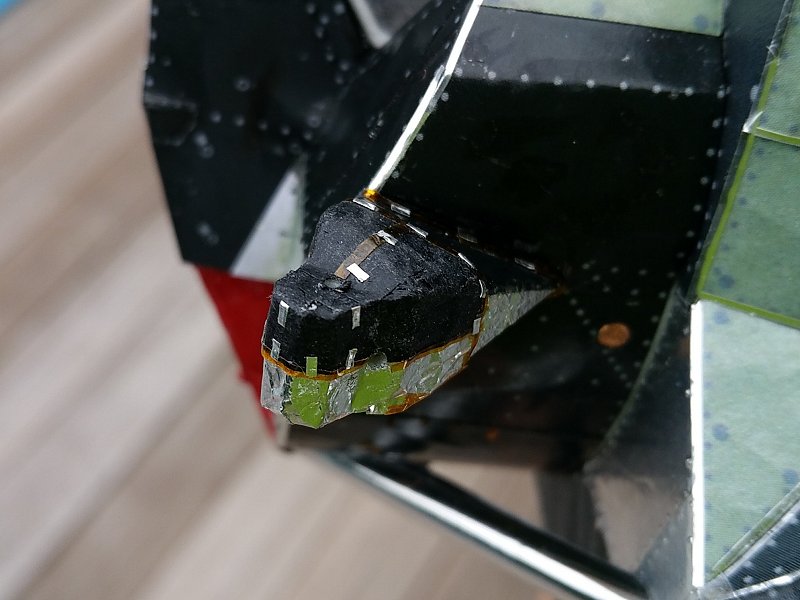
|
history in miniature
Member Posts: 600
From: Slatington, PA
Registered: Mar 2009
|
 posted 05-12-2016 03:06 PM
   
Beautifully done Vincent!! |
Lunokhod 2
Member Posts: 89
From: France
Registered: Sep 2010
|
 posted 05-19-2016 01:29 AM
   
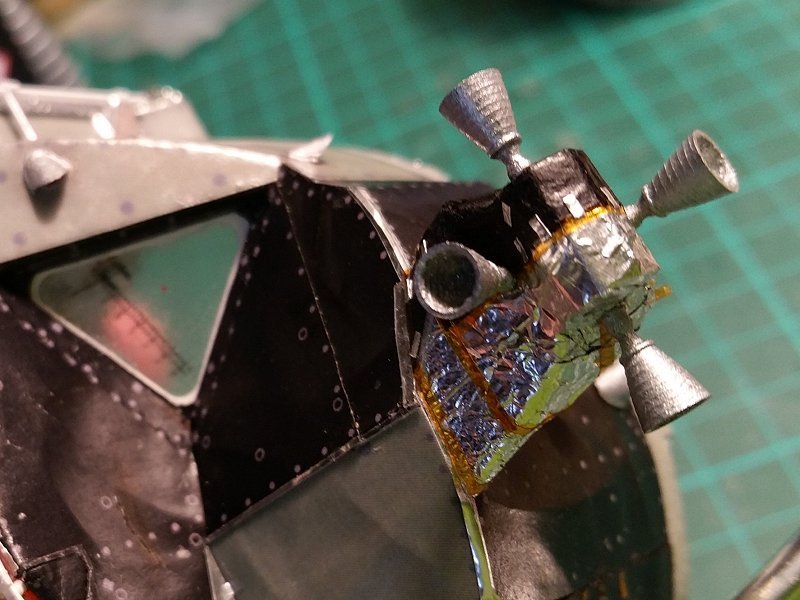
Here are the latest images of my 1/32 which I finally completed:The various vents around the forward section are then installed. 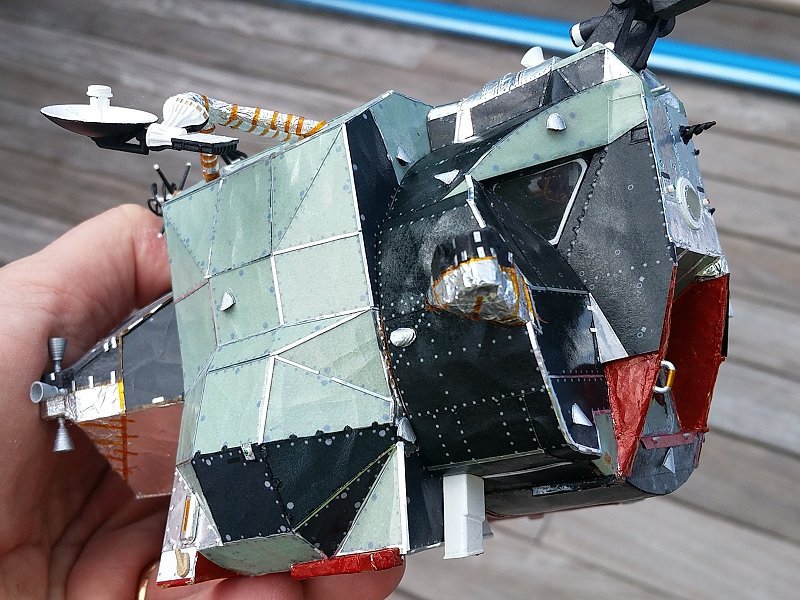 The EVA handrail is made of 0.25 x 1 mm / 0.01 x 0.04 in stryrene strip. The upper fixture is made of 0.75 mm / 0.03 in styrene round rod. 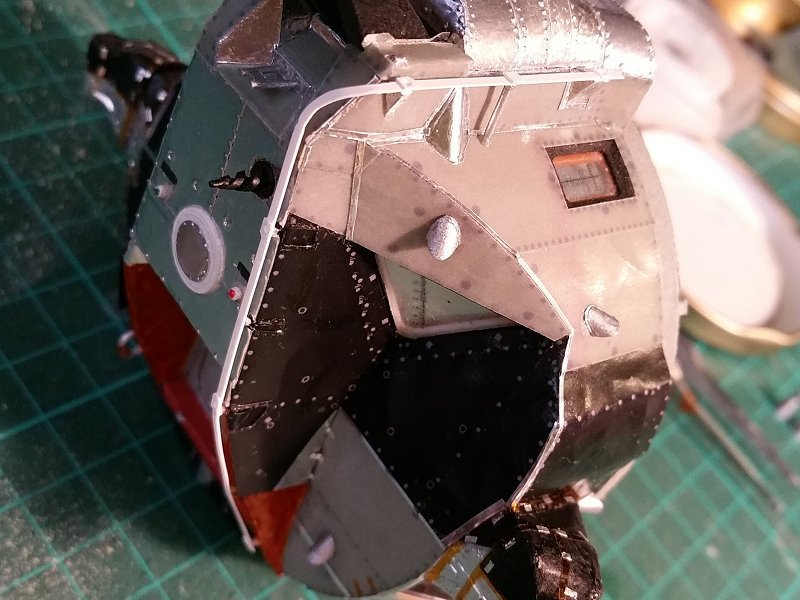 The last items to be assembled are the RCS thrusters
 Finally a complete model with still some work to do like the lunar base and the astronauts. The idea is to fix a pole on the lunar base to which the 1/32 CSM will be attached. This should be finished by July 2019 I hope
 
All instructions to build this model can be found [url=]on my web site[/url]. A final 3D design will be the HGA for the LRV, I have already done it at 1/6 for Pascal Hecker and I am downscaling it and simplifying it for 1/32. |
Panther494
Member Posts: 402
From: London UK
Registered: Jan 2013
|
 posted 05-19-2016 05:26 AM
   
So very very impressive. Beautiful work, I'm a model maker and artist and can only hope to one day build to this quality. Amazing. |
DeepSea
Member Posts: 68
From:
Registered: Jun 2014
|
 posted 05-19-2016 05:45 AM
  
Absolutely amazing. I would *love* one of these but sadly my skills at model-making and painting are non-existent. My brother was the one who got that talent! |
Daugherty54
Member Posts: 591
From: Cabot, Arkansas, USA
Registered: Sep 2010
|
 posted 05-19-2016 02:40 PM
   
Okay, I think the cost for all the 3D printed parts for a 1/32 LM with interior will be about $877. Maybe another hundred for miscellaneous materials.Pascal and Stephen, anyone? Who wants to tackle this first? Boy I want this as much as I coveted Ron's 1/12 rover! |
apolloprojeckt
Member Posts: 1447
From: Arnhem, Netherlands
Registered: Feb 2009
|
 posted 05-19-2016 03:21 PM
   
Better is to let it print in the U.S. (cheaper) and maybe as Steve has time it's closer by you. From Europe to the U.S. has more risk (custom control) than shipping intern the U.S. |
Ronpur
Member Posts: 1211
From: Brandon, Fl
Registered: May 2012
|
 posted 05-19-2016 07:49 PM
   
Amazing!! |
Space Emblem Art
Member Posts: 194
From: Citrus Heights, CA - USA
Registered: Jan 2006
|
 posted 05-19-2016 09:44 PM
   
So who else is drooling over this?
|
Norman.King
Member Posts: 375
From: Herne Bay, Kent, UK
Registered: Feb 2010
|
 posted 05-20-2016 01:57 AM
   
Very impressive. |
Lunokhod 2
Member Posts: 89
From: France
Registered: Sep 2010
|
 posted 06-16-2016 09:01 AM
   
I am very happy to inform you that I finally completed all parts of a 1/32 and 1/24 printed LRV model. This goes with my 1/32 and 1/24 printed model of the lunar module. Originally I only designed the LRV in the early phase of deployment but I received several emails asking me whether I would design the remaining parts such as the rear pallet, TV camera or HGA. In the meantime I worked hard for Pascal Hecker on his 1/6 LRV and I manage to use the work in designing the remaining 1/32 parts.All parts are now available on Shapeways in the 1/32 and 1/24 LRV stores and instructions and links to the parts are also available on my web site. This really completes my work on designing a 1/32 lunar module for almost every mission (to be honest I still need to design the scimitar antenna and the ALSEP quadrant for Apollo 9 although this particular mission is less in demand). Link to my website for the LRV instructions (click on the image to see the instructions). Link to my 1/32 LRV store. |
toddmp
Member Posts: 55
From:
Registered: Jan 2014
|
 posted 06-16-2016 02:06 PM
  
I'm wondering what the minimum pieces are that would be needed to build a nice exterior only model (no detail inside). It seems like going with 3/4ths the pieces you have modeled would still result in a more detailed piece than anyone has put out so far. |
Philip
Member Posts: 5952
From: Brussels, Belgium
Registered: Jan 2001
|
 posted 06-19-2016 10:06 AM
   
Bon travail Vincent. Is the astronaut figurine available as well? |
Lunokhod 2
Member Posts: 89
From: France
Registered: Sep 2010
|
 posted 06-21-2016 03:59 AM
   
Yes the astronaut figure is available but on Max Grüter's shop on Shapeways.I just discovered through a fellow space modeler that in FUD Shapeways charges $5 per per 3D file as handling fee which means that if you have ten different products in FUD this will cost you $50 plus the price of the material. If you can put these 10 products into a single file, this becomes ONE product and basically you can save $45. So I am working on creating combos for the different versions of the LM. I shall soon offer these combos in 1/32 for the H mission descent stage, then will come the ascent stage, ascent stage interior, J mission descent stage and the LRV. It is a lot of work since you have to puts all part in a limited space and make sure the final file is less than 64 K. I will keep the individual parts which will allow people to reorder lost or broken parts for instance without having to reorder everything. |
NASA Glenn
Member Posts: 79
From: Cleveland OH
Registered: Feb 2007
|
 posted 06-21-2016 08:23 AM
   
Could a 1:32 cockpit and engineering section interiors-only package be made? This could make a LM trainer like at KSC, which could be displayed in a shadow box style picture frame with internal illumination. |
Lunokhod 2
Member Posts: 89
From: France
Registered: Sep 2010
|
 posted 06-28-2016 03:31 PM
   
This should not ne too difficult since all interior parts are modeled around the internal shape of the forward and mid-sections. It will only be a matter of modifying the exterior as a box. |
Lunokhod 2
Member Posts: 89
From: France
Registered: Sep 2010
|
 posted 06-28-2016 03:32 PM
   
I just completed the combination of different parts for a 1/32 LM with no interior. At this stage it is only available for the Class B (Apollo 5), Class D (Apollo 9); Class F (Apollo 10), Class G (Apollo 11) and Class H (Apollo 12 to 14) missions. Then will come the interior of the ascent stage, the Class J descent stage and the LRV. If you go to my web page you will find links to these combo under the Lunar module Descsnt Stage (G and H missions) page and the Lunar Module Ascent Stage page.I still keep the possibility to order parts individually, however ordering a combo greatly reduces the price for the Frosted Ultra Detail parts (the price remains almost identical for the White Strong and Flexible parts). For instance if you want to model the Apollo 11 LM at the moment of Neil Armstrong first step, buying the part individually will cost you about € 510, buying the combos will cost you about € 420.
I also added new parts such as the ALSEP compartment for the Apollo 5 and 9 LMs or the Scimitar antennas of Apollo 5 and 9. |
Lunokhod 2
Member Posts: 89
From: France
Registered: Sep 2010
|
 posted 07-02-2016 09:01 AM
   
It's the start of the sales for the 1/32 Lunar Module. I just completed combining parts for all H series LM with or without the interior. The price is really going down for Frosted Ultra Detail parts. I built the LM-5 by buying all part separately, the final cost without postage is 899.06 € (I paid more actually since I bought the parts along the construction time so I had to pay postage (about 10 €) several times.If you buy the entire LM-5 with interior using the combos the price is now 621.32 €, that a 30% sales or you save almost 278 €. I still need to go back to work and do the same for the J series descent stage and the LRV. For each part part of the LM (only the H series descent stage and the ascent stage today) you will find links to these coboms at the beginning of the page. |
Daugherty54
Member Posts: 591
From: Cabot, Arkansas, USA
Registered: Sep 2010
|
 posted 07-02-2016 08:42 PM
   
Thank you for combining these like this. It helps us that are challenged to know what parts to get! Now to recover from Spacefest and get the money together to buy this! |
Lunokhod 2
Member Posts: 89
From: France
Registered: Sep 2010
|
 posted 07-18-2016 05:08 PM
   
As the 47th anniversary of Neil Armstrong's first step on the moon is approaching. I just completed combining various parts into only a few articles in order to reduce the price. If you go to the main page of my 3D LM model, the links to the various pages will bring you to the items you need to build the model you want from Apollo 5 to Apollo 17. Combining the parts greatly reduces the price for Frosted Ultra Detail plastic as you pay $5 handling fee for each separate part. It is still possible to buy individual parts in case you break or loose some.To give you an estimate and a comparison between individual parts and combined parts, this is below what it would cost. Depending on the configuration you want this may vary: - Individual parts for Apollo 11, no interior: $451
Combined parts for Apollo 11, no interior: $390 - Individual parts for Apollo 11, with interior: $808
Combined parts for Apollo 11, with interior: $581 - Individual parts for Apollo 17, no interior: $657
Combined parts for Apollo ,17, no interior: $502 - Individual parts for Apollo 17, with interior: $1016
Combined parts for Apollo 17, with interior: $695 - Individual parts for LRV-1, Apollo 15: $202
Combined parts for LRV-1, Apollo 15: $84 - Individual parts for LRV-3, Apollo 17: $211
Combined parts for LRV-3, Apollo 17: $101
|
Lunokhod 2
Member Posts: 89
From: France
Registered: Sep 2010
|
 posted 10-31-2016 09:51 AM
   
I just received a mail from a fellow space modeler asking me if I could propose my 1/32 LM parts in Black or Orange Strong & Flexible since you can save 15% off the price today until midnight Pacific Time. You have to enter the code SPOOKY to get that special price.Black strong and flexible is similar to the white one but orange is polished. I would advice for most parts black since the polished version is difficult on more precise parts (the price is the same anyway). I also noted the BSW is a bit more expensive than the WSF and the 15% becomes interesting for large parts and combos making the final price lower. For small parts it is better to keep SWF. Modifying all parts takes quite a long time. If you want something special tell me the reference of the part and I will try to fix the material today. Shapeways store | Website for the construction of the model |
Robert Pearlman
Editor Posts: 42982
From: Houston, TX
Registered: Nov 1999
|
 posted 11-10-2016 06:06 AM
   
Shapeways featured Vincent's space models on its blog. Vincent Meens' Shapeways store is totally out of this world — his designs are all intricately detailed parts for space models. Vincent works for the French Space Agency and has actually given his models to a number of museums, so he definitely knows his stuff. |
Daugherty54
Member Posts: 591
From: Cabot, Arkansas, USA
Registered: Sep 2010
|
 posted 05-04-2018 10:51 PM
   
Here are two initial shots of my Vincent Meens designed 1/32 lunar module, built incredibly well by Stephen Nichols. You seriously cannot appreciate the detail and beauty of this until you see it in person! Kudos to Stephen!  
|


