|
Author
|
Topic: Tamiya 1:100 space shuttle Atlantis model
|
Ronpur
Member Posts: 1211
From: Brandon, Fl
Registered: May 2012
|
 posted 05-31-2012 06:54 AM
   
It seems that Tamiya is re-releasing it's amazing 1/100th scale space shuttle to depict Atlantis on STS-135, with new decals and an optional payload to replace the old Spacelab. It should be amazing! |
the clocks running
Member Posts: 382
From: Rochester, NY
Registered: Jan 2012
|
 posted 05-31-2012 10:05 AM
   
It would be great if Tamiya scribed the heat shield tiles into the mold for this shuttle kit. |
garymilgrom
Member Posts: 1966
From: Atlanta, GA
Registered: Feb 2007
|
 posted 05-31-2012 10:19 AM
   
Are aftermarket tile decals available for this kit? |
the clocks running
Member Posts: 382
From: Rochester, NY
Registered: Jan 2012
|
 posted 05-31-2012 10:04 PM
   
I found this on a forum: Cutting Edge was the only game for that decal set and they are out of business. The only way you might be able to obtain a set is on eBay, and they will be expensive. Sorry for the bad news. I found these decals but it is not quite what you are looking for because I do not see the complete tile decals. |
garyd2831
Member Posts: 640
From: Syracuse, New York, USA
Registered: Oct 2009
|
 posted 06-01-2012 08:29 AM
   
The issue I have with these ones and the ones that came in the new 1/72 shuttle stack kit, is that the USA is larger than the American flag if you were going with the old paint scheme USA/Flag & Grey NASA worm/shuttle name. |
ea757grrl
Member Posts: 729
From: South Carolina
Registered: Jul 2006
|
 posted 06-01-2012 08:34 PM
   
From experience, the Cutting Edge tile decals were a disappointment. It was a great idea, but poorly executed. The 1:144 set was sized for the Minicraft/Entex kit, which is the least accurate of the kits in that scale. The HRSI was printed much too light, which obliged you to do a lot of creative work to darken them on the non-belly areas. They were also a pain to make work (anyone who's used large amounts of carbon fiber decals on Formula 1 kits will know some of what I'm talking about). IIRC, they were also sort of a mismatch of Orbiter features, giving you the HRSI for most all of them but the forward fuselage and upper wing LRSI for Columbia. No aft fuselage LRSI for Columbia's original fit (or Challenger's) was provided, and you were on your own if you wanted to do any other vehicle. I also don't think it included the HRSI for Columbia's SILTS pod, either.What I ended up doing was making a high-resolution scan of the HRSI from the Cutting Edge sheet (for the Revell 1:144 kit, the 1:72 set reduced to 1:144 works perfectly). I doctored it it in Photoshop to taste, and then printed it on decal paper on my inkjet printer. (Legal stuff: I did it for my own purposes, for my own model, for my own use, based on a decal sheet in my possession.) The AFRSI used on Discovery, Atlantis and Endeavour and later partially fitted to Columbia is best represented by painted pieces of tape (I use squares of Tamiya masking tape in 1:144, while Durapore surgical tape would look fine for 1:72 or 1:100). I don't recall the tile decal set being offered in 1:100 or the Tamiya kit, though I could be wrong. Be that as it may, if you can't find a set of decals to perform similar tricks with, there are some nice artistic ways to represent the tiles with the appropriate amount of subtlety. I liked the concept behind the CE tile set, but the effect sort of hit me over the head. |
Ronpur
Member Posts: 1211
From: Brandon, Fl
Registered: May 2012
|
 posted 06-01-2012 09:30 PM
   
I was able to get one set of the Cutting Edge tile decals. I always thought they were a bit grey to work. Because I could only obtain 1 set, I used the for a 007 Moonraker since I didn't have enough to do my whole fleet. I remember someone using a trick by using window screen as a paint mask to simulate tiles. That might work on the 1/100th scale, but this was on a 1/144th orbiter. |
ea757grrl
Member Posts: 729
From: South Carolina
Registered: Jul 2006
|
 posted 06-02-2012 07:38 AM
   
One process I've considered for Shuttle models is undercoating with a medium gray primer, then shooting a blackish-gray for the HRSI. When that's done, use a straight edge and a sewing needle tip chucked in a pin vise to scribe the tile patterns. When that's done, you can weather/fade the tiles as you like using tints, pastels, or whatever method you prefer.Once upon a time I was planning on building a 1:72 Monogram orbiter and covering the appropriate areas with tiny individual tiles cut from .010 sheet. The small area I did looked absolutely terrific, and the effect when it was painted looked perfect. The problem is, of course, it's tedious! |
Ronpur
Member Posts: 1211
From: Brandon, Fl
Registered: May 2012
|
 posted 06-26-2012 07:50 PM
   
This is my Airfix shuttle showing how I tried to simulate tiles by using window screen as a stencil. I like the way it turned out.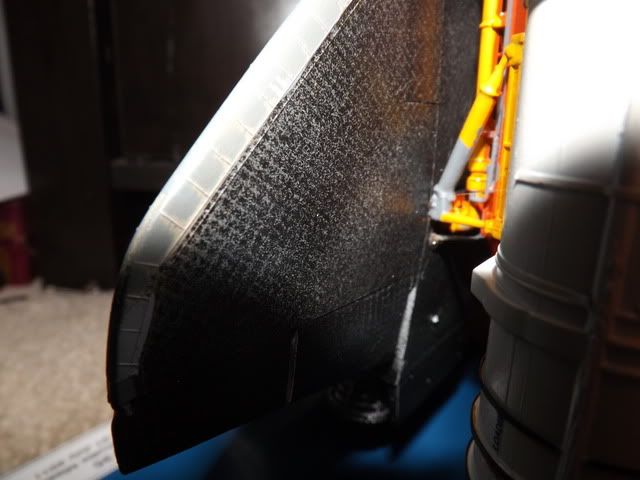 |
Jay Chladek
Member Posts: 2272
From: Bellevue, NE, USA
Registered: Aug 2007
|
 posted 06-26-2012 08:15 PM
   
The screen method turned out reasonably well. Back in 2003 when I was working on a Columbia STS-107 model (also an Airfix kit), I also tried the screen method. I got pretty far along with it too when I heard Cutting Edge was doing their decals. So I waited until they were released and used them instead. I am glad I did, but ultimately I think the screen paint would have worked fine if I ended up using it.By the way, Cutting Edge never did a 1/100 sheet (I asked them, but it never happened). Ed Bisconti on eBay "may" have done one, but 1/100 doesn't command the aftermarket like 1/144 and 1/72 do. Keith McNeill in the UK I believe can do a 1/100 decal set which uses a high resolution photo of one of the shuttles during RPF backflips (probably Discovery) and they look perfect to my eye. But they are also EXPENSIVE, which is why I haven't ordered them (I am currently independently poor). As for the CE sheet itself, I wouldn't say it was badly executed. It was good enough for the time it was issued since this was years before RPF maneuvers gave us the REAL images of what a shuttle bottom looked like. They correctly guessed about gray tiles, but didn't take into account that only the tiles on the bottom are gray while the black ones on top remain black in color. When I did my 1/144 Columbia and 1/72 Atlantis models, I ended up with a very nice effect, using clear tints to blend in the decals on the sides of the nose (I didn't use any of those decals on top). The only real problem I encountered with CE designing them for the Minicraft kit involved the tops of the nose section as I had to cut tile elements into small pieces to graft them on. But I ended up with an excellent result. In 1/72, the decals fit a lot better, although there were some dimensional issues I had to overcome between the Monogram kit I was using and the Revell kit the decals were designed for (the Monogram kit is slightly narrower in the rear). I've still got a couple of each sheet stashed away for later shuttle projects. But of course, that won't help for 1/100 scale. I also have considered doing thin strip styrene for the tiles. But my method (if I ever devote the time to doing it) will be to lay on strips of styrene cross scribed to do about 10 to 20 tiles at a time on the flat bits. The individual tiles would be added to fill in certain spots, like a jigsaw puzzle. I did some rough math and figured it would STILL take about two months to do that, and that would be on a shuttle with AFRSI blankets, not a real flying brickyard with tiles on the whole nose and sides like pre-1988 Columbia and Challenger. |
Ronpur
Member Posts: 1211
From: Brandon, Fl
Registered: May 2012
|
 posted 06-26-2012 09:21 PM
   
I don't know what I will do for the 1/100th kit. Decals would be nice, but I doubt we will see them at a reasonable price. |
the clocks running
Member Posts: 382
From: Rochester, NY
Registered: Jan 2012
|
 posted 06-26-2012 10:12 PM
   
quote:
Originally posted by Ronpur:
This is my Airfix shuttle showing how I tried to simulate tiles by using window screen as a stencil. I like the way it turned out.
Great job simulating the tiles on the shuttle! |
crowe-t
New Member Posts:
From:
Registered:
|
 posted 07-02-2012 10:07 PM
   
quote:
Originally posted by ea757grrl:
I liked the concept behind the CE tile set, but the effect sort of hit me over the head.
I scanned a set of Cutting Edge 1/144 tile decals and changed the coloring a bit for use on a current 1/144 Revell shuttle build. I also have an original CE 1/72 Tile decal set and never thought to reduce it to 1/144 for a better fit on the Revell shuttle. It makes perfect sense due to the CE 1/72 tile set being designed for the 1/72 Revell shuttle kit. |
Ronpur
Member Posts: 1211
From: Brandon, Fl
Registered: May 2012
|
 posted 08-08-2012 04:51 PM
   
Did anyone ever get this kit yet? |
divemaster
Member Posts: 1376
From: ridgefield, ct
Registered: May 2002
|
 posted 08-08-2012 06:12 PM
   
You may want to drop a note to Tom at Tango Papa Decals and see what he may have in his computer. I know he did a series of shuttle decals, but don't know if he did the 1/100 scale or the heat shield. |
Ronpur
Member Posts: 1211
From: Brandon, Fl
Registered: May 2012
|
 posted 07-14-2013 08:05 PM
   
Has anyone ever seen a tailcone kit in this scale? |
Ronpur
Member Posts: 1211
From: Brandon, Fl
Registered: May 2012
|
 posted 07-19-2013 12:37 PM
   
Finally finished the Tamiya kit. This was the original version, so I built it as Enterprise: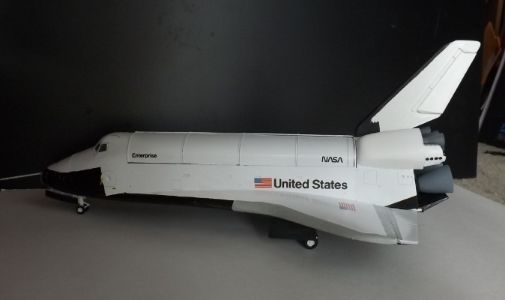 The hardest part was sanding the engines smooth to represent the SSME mock-ups. 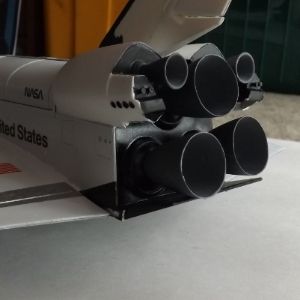 The Cargo Bay: 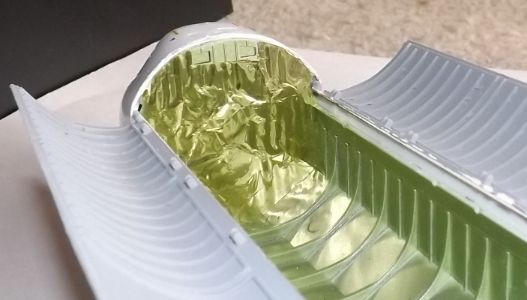 I had fun building this kit. Now, I can start on the Atlantis kit that is waiting on the workbench. |
Ronpur
Member Posts: 1211
From: Brandon, Fl
Registered: May 2012
|
 posted 08-01-2013 07:55 AM
   
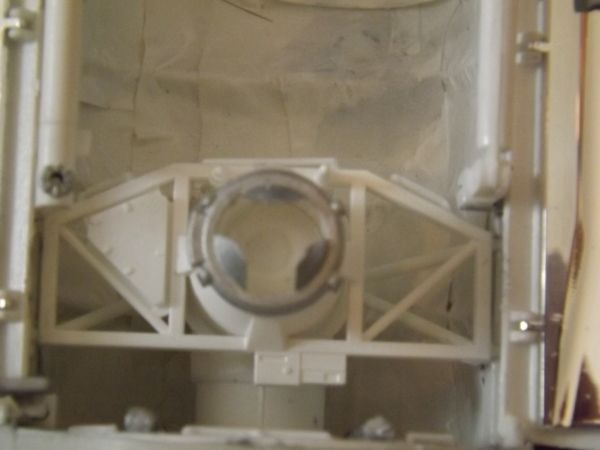
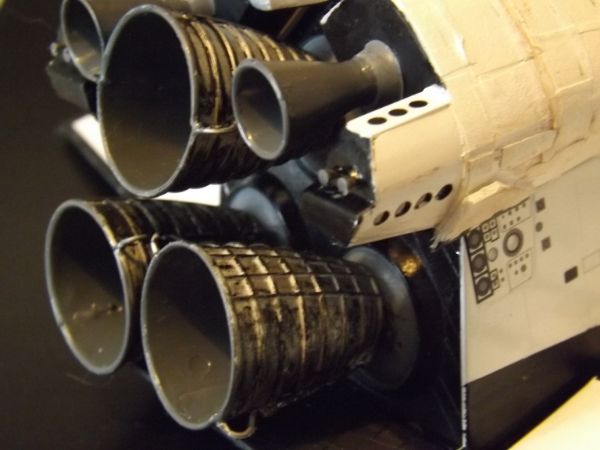
I just finished my Tamiya 1/100th scale Atlantis model. I added medical tape in tiny squares and strips and scribed tiles on the bottom to represent the TPS on Atlantis. This is a new kit that has an OBSS and MPLM to represent STS-135. I did not try to duplicate tile for tile, but just give a good impression of what the orbiter looks like.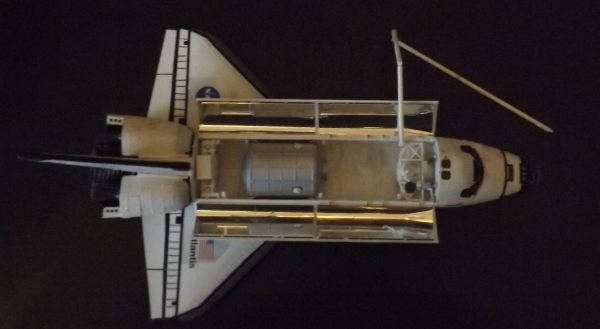 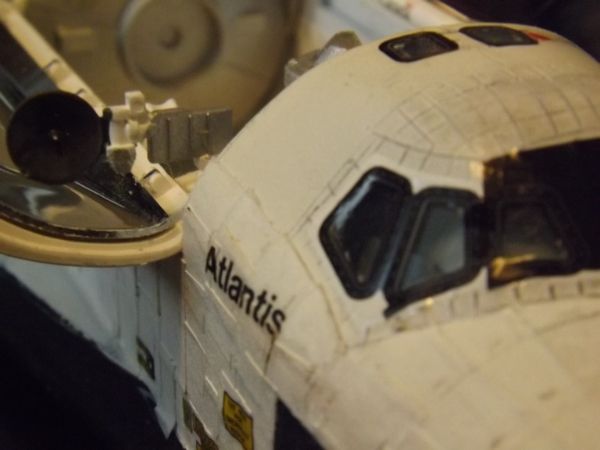

|
apolloprojeckt
Member Posts: 1447
From: Arnhem, Netherlands
Registered: Feb 2009
|
 posted 08-01-2013 08:07 AM
   
Very good end result! My compliments. |
Jay Chladek
Member Posts: 2272
From: Bellevue, NE, USA
Registered: Aug 2007
|
 posted 08-01-2013 11:50 PM
   
Very nicely DONE! Enterprise looks great, but Atlantis looks OUTSTANDING! |
mode1charlie
Member Posts: 1169
From: Honolulu, HI
Registered: Sep 2010
|
 posted 08-02-2013 02:03 AM
   
Well done! |
Tykeanaut
Member Posts: 2212
From: Worcestershire, England, UK.
Registered: Apr 2008
|
 posted 08-02-2013 03:48 AM
   
Looks very good, well done! |
Ronpur
Member Posts: 1211
From: Brandon, Fl
Registered: May 2012
|
 posted 08-02-2013 06:47 AM
   
Thanks!! |
Ronpur
Member Posts: 1211
From: Brandon, Fl
Registered: May 2012
|
 posted 08-29-2014 06:44 PM
   
13 months after finishing my Atlantis Tamiya model, I have built Challenger. This time, I used the Spacelab and parts from the STS-135 kit to show Spacelab D-1 on STS-62A. I used the Warbird decals for the tiles, but had to buy a second set to finish some of the white tile areas on the payload bay doors and tail. Many areas of tiles are missing from the 1/100th sheets. I will use the black tiles left over to redo the bottom of Atlantis.  


I finished the model with a heavy heart when learning of Steve Nagel's death last week. He was always one of my favorite astronauts since he attended the University of Illinois, which is where I studied. It is my tribute to him and the others of that crew that have passed, as well as all of Challenger's crews. |


