|
Author
|
Topic: Stratosphere Models 1:48 Orion CEV
|
First light
Member Posts: 85
From: Canada
Registered: Apr 2007
|
 posted 11-13-2007 11:38 PM
   
I just started to build a large model of the Orion CEV model 607 in 1/48th scale about a week and a half ago, here are pictures or the work in progress:
Here you can see the five largest main parts making the CEV command module and service module. 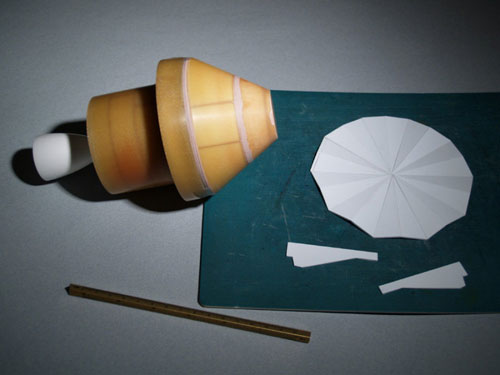
What you see are the pre-master parts, the final model will be made of pressure cast polyurethane resin parts, with most large parts being hollow-cast.The command module here will be reproduced in fiber-glass and those new parts will be detailled and scribed and will become the final master parts. I will then make a silicone molds to make the final parts in resin. Here you can also see the solar panel master part in progress and the panel arms. The final solar panel. This is also not the final part, I will make a special mold from which vacuum forme plastic sheet will molded to make thin solar panel components without need for photo-etched parts. The model features the latest up to date avionics ring with curved side-walls (unlike the flat-panelled sidewall of the earlier 606 CEV version), the model does include as well the longer service module rear section, larger solar panels, and a wide variety of other changes that were not included in earlier models, such as different position of RCS engines on the command module, different panel lines and details on command module, no "mylar" foil on the service module, etc. The service module will also feature radiators. But of course, anyone who wishes can still put gold mylar on that part to add a touch of color to the model (I plan to try that myself). The parts you see here are fiberglass (and have been polished smooth like glass)(I will polish it even further when the final masters for the command module are ready).  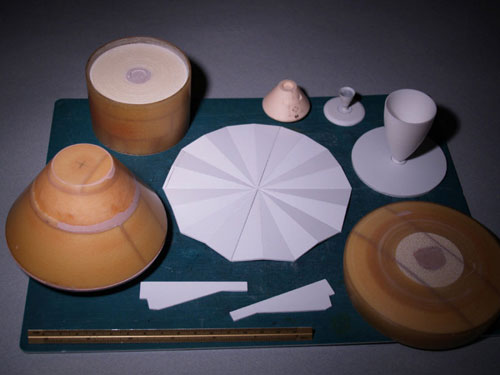
For size comparison purpose, here you can see the main parts for the 1/48th scale Orion CEV model 607 from NASA right next to an earlier version of the Orion CEV I made (but did not complete) in 1/144th scale (and that was for the earlier 5.5 meters diameter version from Northrop Grumman, the 607 latest version from Lockheed Martin is 5.0 meters diameter, so it shows you how big the model is. The ruler next to the parts is 15 cm long. |
First light
Member Posts: 85
From: Canada
Registered: Apr 2007
|
posted 11-21-2007 07:36 PM
Here is my next update on the work in progress my Orion CEV model 607, 1/48th scale model.Here I glued and completed the master for the solar panels: 
There are still some little spots to correct with filler, but the shape and length of each segment have been adjusted and everything fits. A mold will soon be made for that part. The final panels will be vacuum formed. I will probably provide completely flat round panels too as an option.Here's the fiberglass molds for the command module cone shape and the heat shield (which I nicknamed: fiberglass omelet and flan pudding). Don't be scared, it will look much better in a moment. 
Here's a picture of the final molds for the command module capsule shape and the heat shield for the CEV.Much better looking that the previous pictures. There are a few nicks and scratches inside, typical of that type of mold after demolding the masters (I found there was a slight overhang on the heat shield, so I had to struggle to get it out of the mold, but that one, I saved it in one piece (unlike the cone shape). The small scratches and couple of small air bubbles will be easily repaired and polished, then I will make the fiberglass copies that will be used as the final master parts and detailed and scribed. 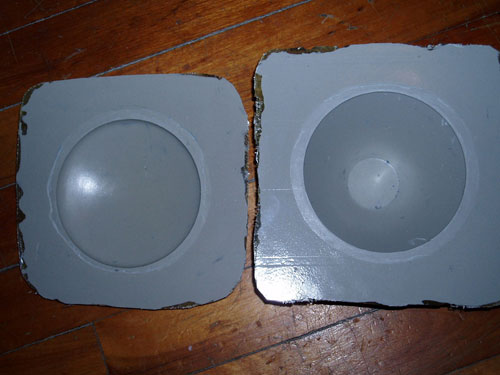 |
First light
Member Posts: 85
From: Canada
Registered: Apr 2007
|
posted 12-17-2007 03:48 AM
Perfect fiberglass castings for the CEV command module and heat shield, not a single hole on the surface (this time I put my gel-coat super-thick). Despite my initial worries, the cone demolded like a charm. These are pictures from a few days ago, just after I demolded.
And the completed master for the "PICA" heat shield for the CEV command module (phenolic impregnated carbon ablator). The actual full-scale five meter wide test item heat shield can be seen on the Boeing website. The scribing also went like a charm, a night of work. Enjoy.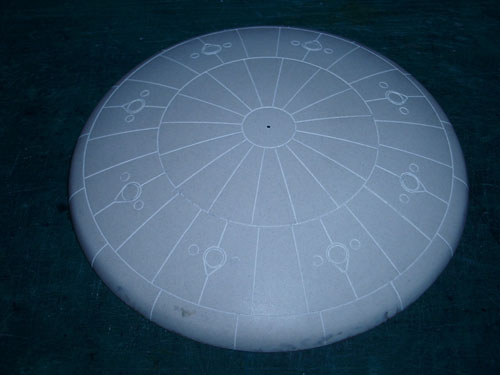 |
First light
Member Posts: 85
From: Canada
Registered: Apr 2007
|
posted 12-17-2007 03:54 AM
Here are the panel lines traced on the fiberglass master for the command module, ready to be scribed:
Another view with the windows and other details carved out: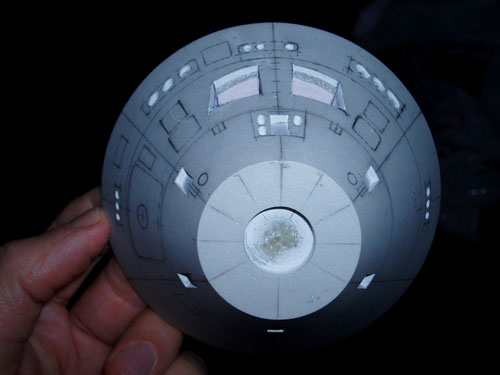 |
First light
Member Posts: 85
From: Canada
Registered: Apr 2007
|
posted 12-17-2007 03:58 AM
The Orion 607 CEV Stratosphere Models 1/48th scale kit is practically completed!It was faster than expected and in fact it would have been even faster if it had not been for me being very busy three weeks earlier with an urgent matter which is now completed. I am now free to devote more time to the CEV and other kits. 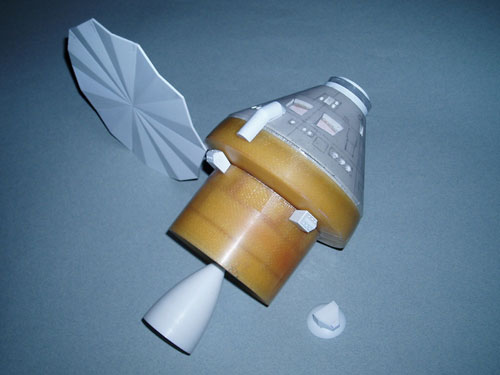

The only thing left to do is scribing the command module, finishing the windows with plastic sheet, making the small rocket nozzles (completed two days ago morning) and the attachment points for the solar panels, modifying the solar panels and adding the radiators (and decals, a matter of only a few hours).I am designing the kit in a totally modular fashion so that it will be easy to update if ever they do change some elements and make a 608 version. I am also designing a very special base which will be customizable. |
First light
Member Posts: 85
From: Canada
Registered: Apr 2007
|
posted 12-17-2007 12:49 PM
A quick update: I am going to add some additional details to the service module as I just found some new fresh documents. I will keep you up to date about the changes as soon as they are made. A good thing too that I designed the kit in a modular fashion, the changes will be incorporated easily. |
First light
Member Posts: 85
From: Canada
Registered: Apr 2007
|
posted 12-21-2007 01:50 PM
Here is the corrected solar panel master part: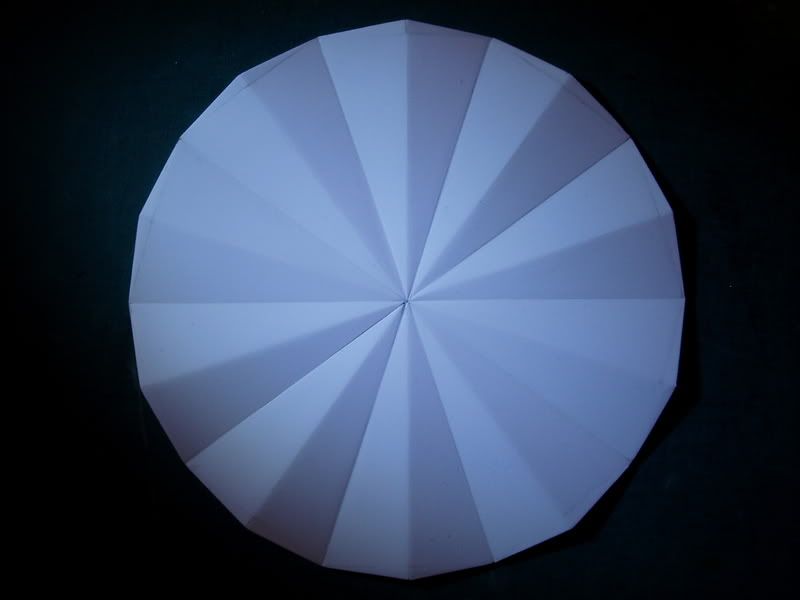 A little filler and it will be done. More pictures coming soon. |
First light
Member Posts: 85
From: Canada
Registered: Apr 2007
|
posted 12-28-2007 05:00 PM
I continue with the progress on the what is now known as the Orion CEV 606-C.I found out a new document, all fresh from late November with a lot of new information, and it turns out that what I was modeling so far was the Orion CEV 606-A. There has been some little changes and the model is now made officially to the Orion 606-C standard. Based on what I have read about the project's schedule and previous NASA meetings, I do not expect any other changes (at least nothing bigger than changing panel lines or small details) for the CEV command module itself.
We are now down to groups of two engines for the CEV command module (from previous groups of four engines for the 606 version, to groups of three maneuvering engines for the 606-A, to now groups of two for CEV 606-C). It cannot go lower than that, because NASA has a requirement for redundancy for critical systems. So at least, for the maneuvering engines it is fixed. For the service module, there are some relatively important changes but they were easy to add to the model since it is built in a modular fashion. The changes concern the number of maneuvering engines and auxiliary engines. We go to groups of four and two engines. They have now added what looks like composite radiator panels on the SM (as hinted in the document I have found). Here is the almost complete high gain antenna: 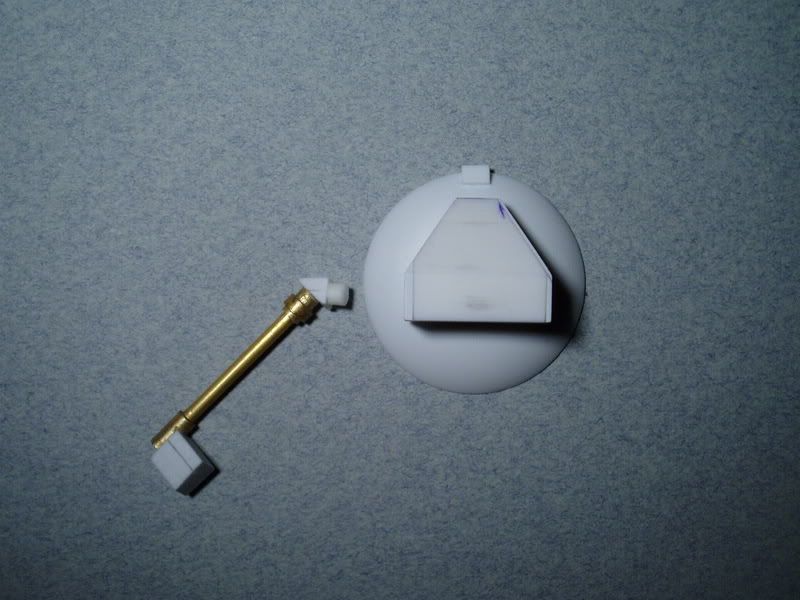 The new Orion CEV 606-C version, we're almost there! 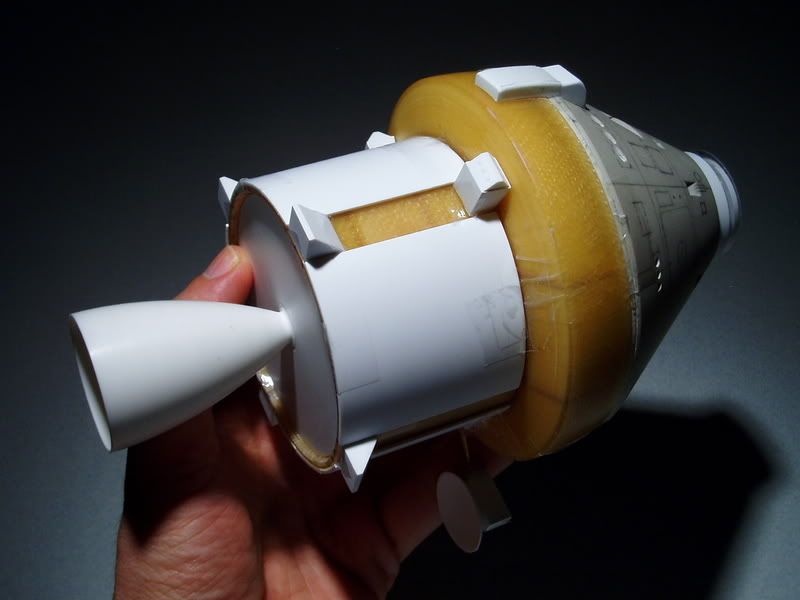 The photo shows the four new panels on the service module. The auxiliary engines will now be off center and mounted on the 4 wedge shapes on the circumference of the rear fuselage.  
I am now working at completing the small details and I am already working on the base. I will soon reduce the number of RCS engines on the CM to bring it to 606-C standard. I will start to make the first molds as soon as I receive the first orders that are underway, for this early January. More updates and pictures to come, soon! |
First light
Member Posts: 85
From: Canada
Registered: Apr 2007
|
posted 01-12-2008 05:49 PM
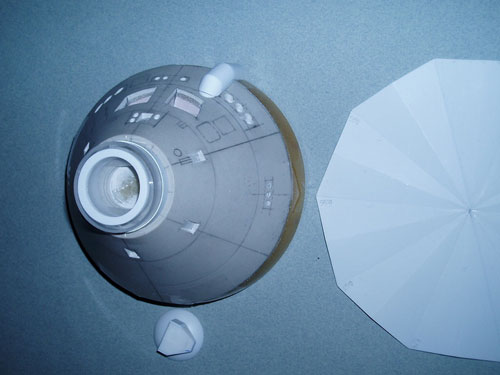
I am now going for interior detail parts for the avionics ring. This may sound slightly like overkill at this stage, but since I have a picture showing the internal details, I decided to add those. If the modellers mount the Command Module on a sting that goes inside the avionics ring, they will be able to make the CM removable and the internal details will be visible.The Bondo flange inside the avionics ring was not there originally when I turned the part. I will detail how I added it as well as the concave bulkhead for the fuel tanks later on, this was quite simple but required a series of little special tools I made to create these. 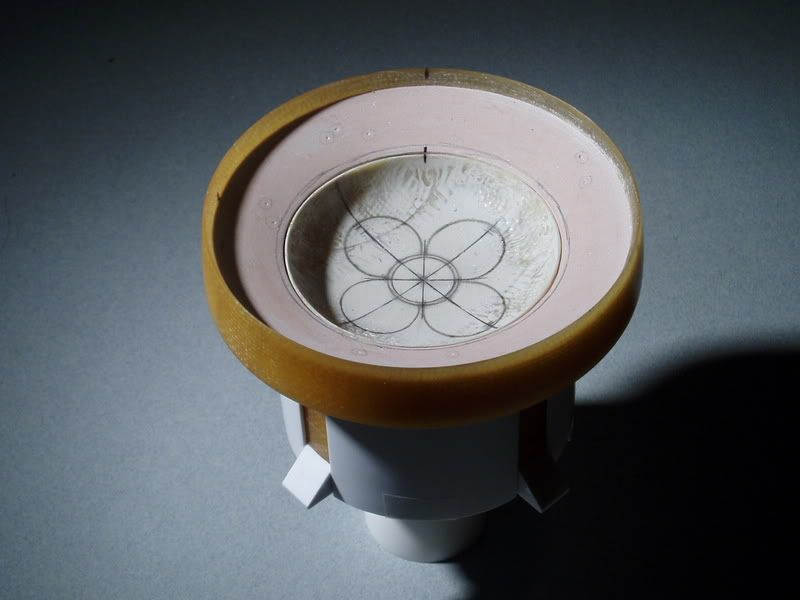 This is the avionics ring after modification. I totally removed the floor of the ring and replaced it with a new bulkhead with holes through which the top of the fuel and oxidizer tanks are visible. More details will be added. The dome shapes that you see do not represent the final size of the tanks. 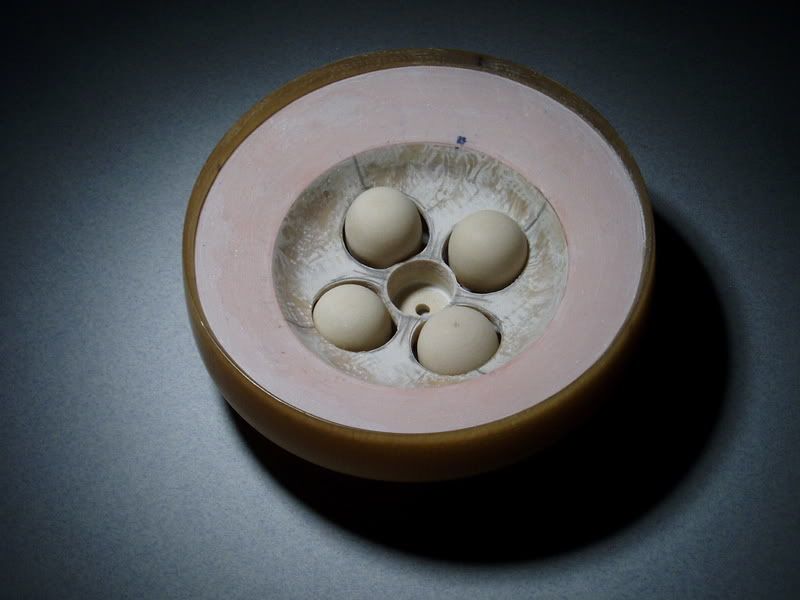 The white components represent the final diameter of the top of the fuel tanks. The ochre parts are just there to show what the final arrangement will like with the domes installed.  |
First light
Member Posts: 85
From: Canada
Registered: Apr 2007
|
posted 01-16-2008 07:14 PM
The solar panels in full production. I started manufacturing the first parts for the CEV Orion kit last night. The result is very good as the parts are inherently stable and rigid due to the corrugations of the panels (they will not deform, unlike a flat solar panel made of the same material or from resin). The material is quite thin, so it replicates quite well the appearance of actual solar panels, and it is lightweight, which is a good thing, since the attachment points for the solar panel arms will be very thin (I will use piano wire inserts inside the castings for each of those attachment parts).  |
First light
Member Posts: 85
From: Canada
Registered: Apr 2007
|
posted 01-23-2008 09:37 PM
The base for the model of the Orion CEV is almost complete, here are the first photos.I will also most likely add a bevel to the side of the base. I am now going to smooth finish the masts and attach everything and make the assembly points.
|
First light
Member Posts: 85
From: Canada
Registered: Apr 2007
|
posted 02-04-2008 02:49 AM
This is the tool I designed to scribe concentric circle and panel lines on the Command Module for the CEV Orion kit.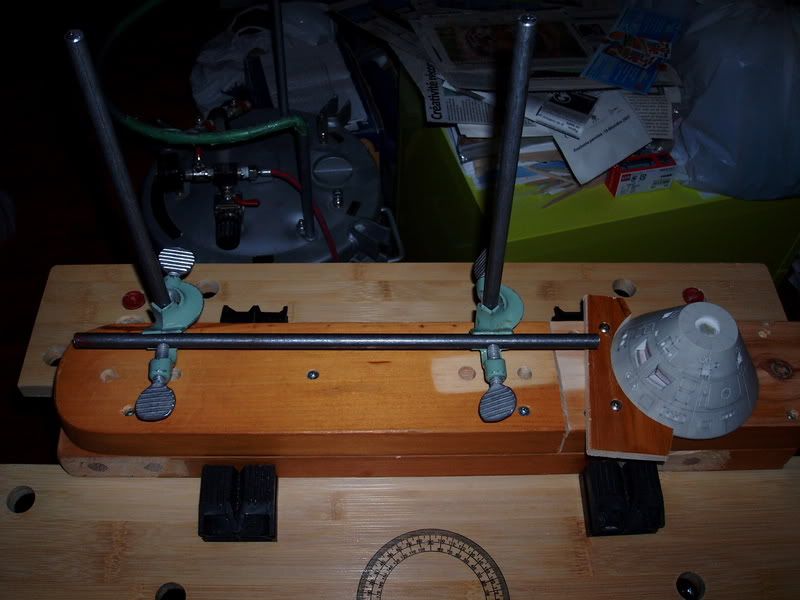
This tool have the advantage of being very simple and flexible, yet, most importantly, very low cost. All the wood is simply free recuperated wood I found and cut. The most expensive items in the tool in question were the two laboratory clamps that I had to pay more than $20 each, used. The only other component I paid for was the steel rod for $5.
Drawings I had made for earlier versions of the circle scribing tool would have used a granite base and many more metal components and epoxy putty, but they would have cost a lot more money and would have been cumbersome and inflexible, since everything would have been glued in place. Granite was not cheap even for a small piece, and cutting it was even more expensive (and lead time to have it cut were too long for me). Furthermore, the granite base would have been very heavy, and fragile.
In the new simple design which I built in just one morning, I can take apart every component and store them away where they will not take up space. I can also customize the base and add elements to put some parts I want to scribe higher or lower. The two clamps allow me to adjust the height of the cutting tool where I want. The design is very rigid, I only need to roll some tape around the base of the steel rods to make them hold firmly in place in their holes, and the clamps of the simple wood working bench hold the wood base firmly. I modified the simple wood working bench with several metal truss parts to make it rigid.
The cutting of the panel lines went fine. The only thing I could have made better is the cutting tool. I made mine out of brass, but I found out that the cutting edges dulls pretty fast because of the highly abrasive content of the fiber-glass master part, forcing me to frequently re-sharpen the tip. Next time, I will make the cutting tool out of tool steel or carbon steel (or diamond tips). I will see. Bondo also changed the content of its lightweight automotive filler a while back and added a lot of pyrite into it.. (to lower its weight, and fabrication cost..). The high pyrite content gives a little "snow sparkle" effect to the master part when seen up close under a light, all that pyrite content also contributes significantly to the abrasion of the cutting tool.
But since I wanted to built the tool fast, I used a flat brass rod, cut it at 45 degrees and sharpened it. I simply glued the cutting tool on the steel rod with cyanocrilate. Next time, I'll use a steel cutting tool. |
First light
Member Posts: 85
From: Canada
Registered: Apr 2007
|
posted 02-08-2008 01:42 AM
 A close up view of the circle scribing cutting tool completed 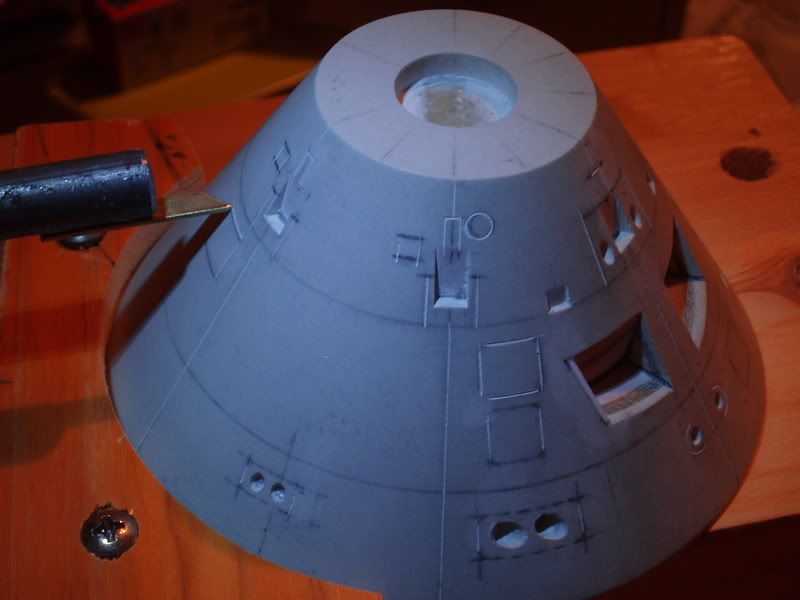 |
First light
Member Posts: 85
From: Canada
Registered: Apr 2007
|
posted 02-08-2008 01:51 AM
The master for the CEV Orion Command Module part is now complete. I finished scribing the last concentric circle lines and I filled all scratches and polished the model: 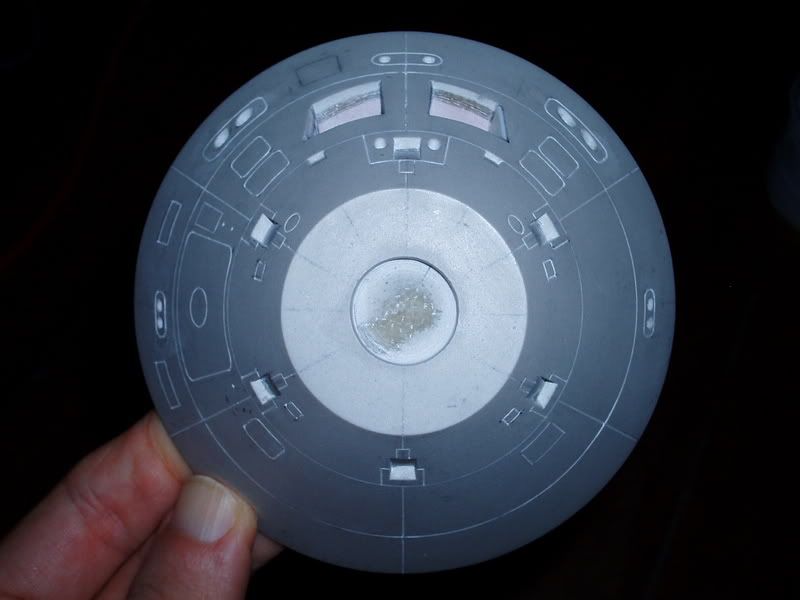
And the final result: 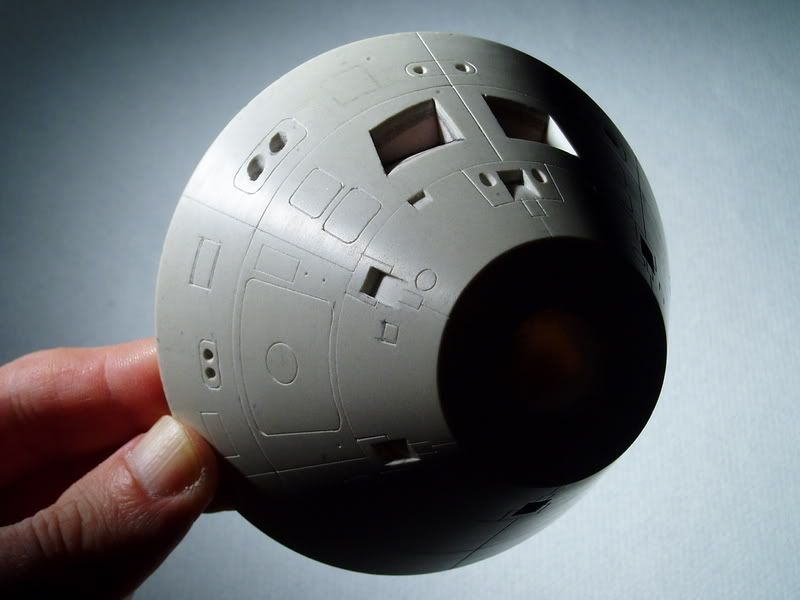 I will still retouch one or two RCS motors and it will be done, almost. |
First light
Member Posts: 85
From: Canada
Registered: Apr 2007
|
posted 02-25-2008 09:58 PM
Here is the latest update on the Orion CEV kit progress. I am now adding extra little detailing to the kit, take a look at the docking ring part I just completed: |
First light
Member Posts: 85
From: Canada
Registered: Apr 2007
|
posted 02-28-2008 06:16 PM
Ok, this one gave me trouble, I worked on it all of last night just to redo the central panel line something like six times.. file and polish the top of the Command Module several times as a result, and scribe, re-scribe and install the windows. Sometimes the whole machine bogs down just for little things. But at least, now it's done.The RCS engine exhausts edges have now also been corrected and smoothed. Almost done. Now I will deepen the holes unto which the escape tower would normally be attached, and will add some tiny details there. And after that: the molds! I can't wait to see the first castings.  |
First light
Member Posts: 85
From: Canada
Registered: Apr 2007
|
posted 03-06-2008 09:56 PM
Completed master part for the CEV Orion kit: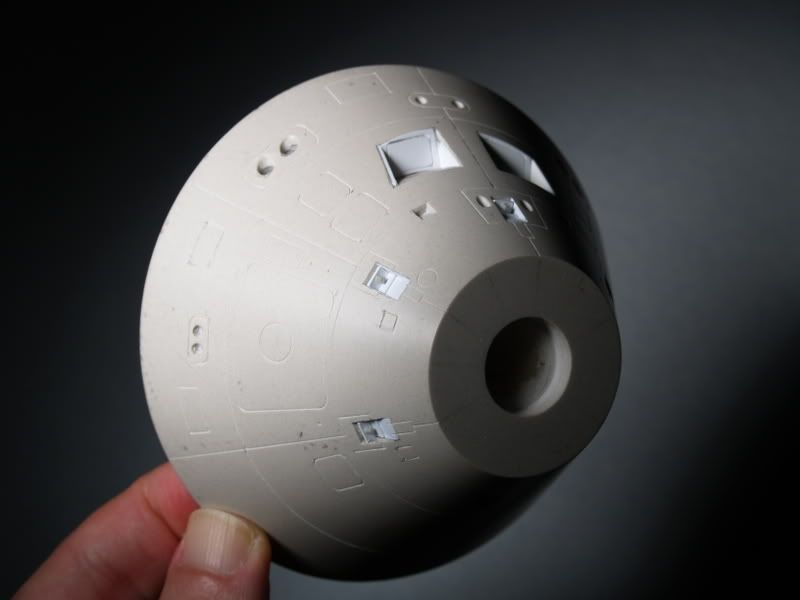 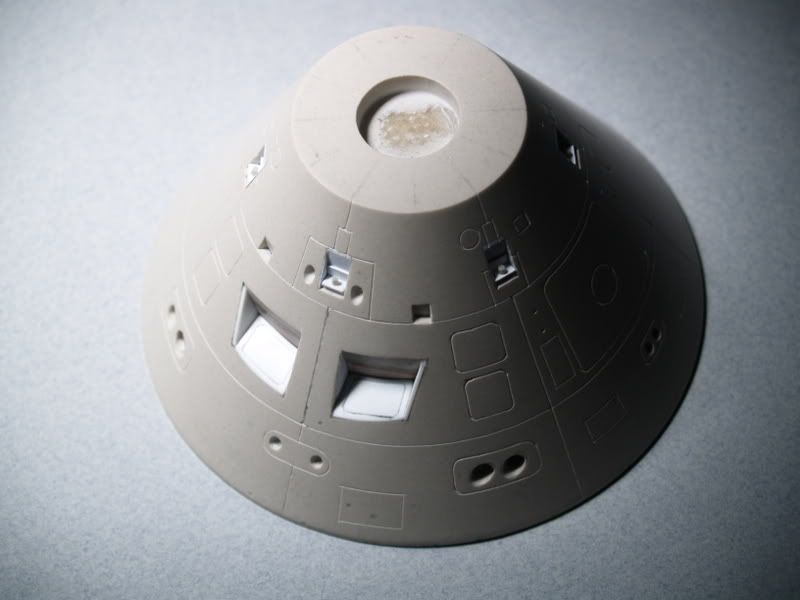
And the first test shot castings, from last night, enjoy:  
|
First light
Member Posts: 85
From: Canada
Registered: Apr 2007
|
posted 03-06-2008 10:01 PM
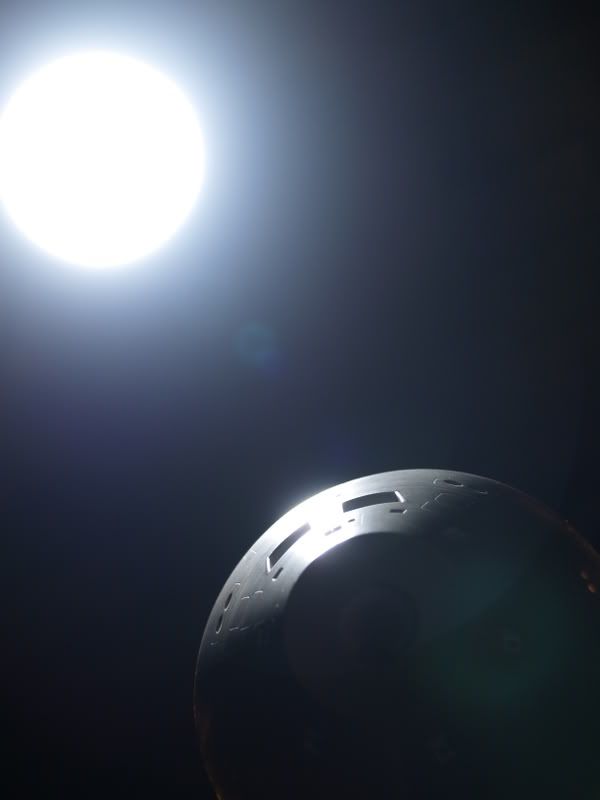
Houston! We have a reentry! Fresh new pictures from two days ago, just before pouring the molds I took these pictures. Just to show you how impressive the pictures will look when the kit will be complete.
Enjoy! The Command Module is now complete. Casting have started. |
First light
Member Posts: 85
From: Canada
Registered: Apr 2007
|
posted 03-06-2008 10:40 PM
 
|
First light
Member Posts: 85
From: Canada
Registered: Apr 2007
|
posted 03-10-2008 09:39 PM
I have now added many more molds and will be casting more test shots soon. The last molds remaining to be made are those for the avionics ring, the solar panels arms and attachments and some of the RCS engines, plus additional copies of some of the molds. |
First light
Member Posts: 85
From: Canada
Registered: Apr 2007
|
posted 03-16-2008 06:01 PM
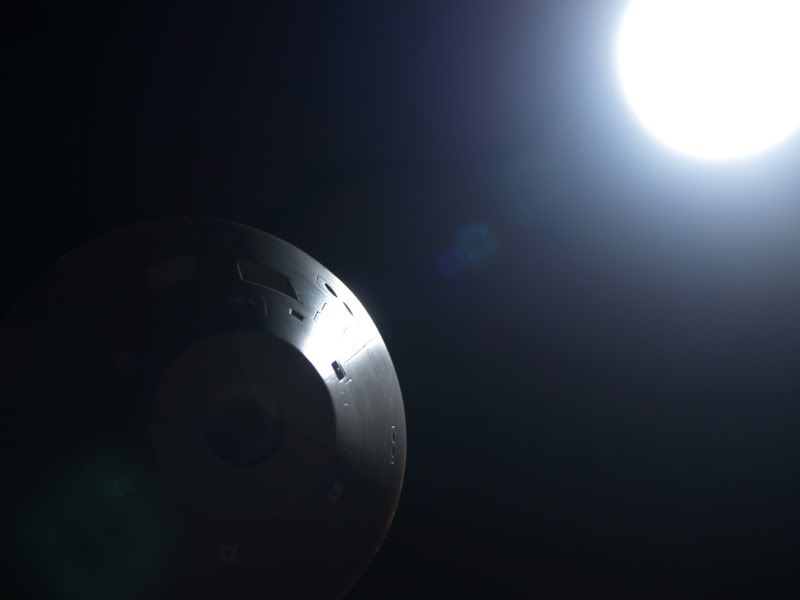
Orion CEV 606-C in orbit! Enjoy!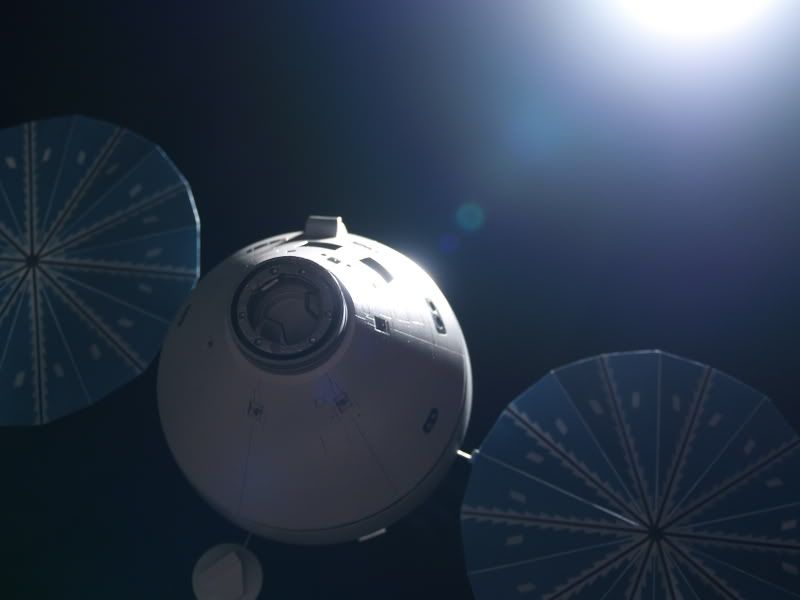 


The Orion CEV 606-C kit from Stratosphere Models is about complete (save for the base mold and for a few last duplicate small part molds and the avionics ring mold). Some small details may differ in the final model. I did scratchbuild the solar panel arms, the clasps for the docking ring and hand painted with masks the solar panels for these photos, as the castings for those parts were not yet available when I assembled the demo model. The kit will have decals for the solar panels. But just to show you how easy it is to replicate realistic solar panels only with paint, a felt market and an x-acto, so I did it this way for the photo shoot. I could have detailed them some more, but the photos and the model were made during a period of 24 hours only. |
First light
Member Posts: 85
From: Canada
Registered: Apr 2007
|
posted 03-17-2008 06:46 PM
Here are some more shots of my CEV model kit: The view people may have from the ISS when the CEV will dock to the station.  A little more details about how I painted the solar panels: I created three templates out of thin plastic sheets, the biggest template was the one to create the small grey triangle shapes, these were used as lose masks to airbrush the details. It was easy to align because of the folds in the solar panels. I bent that template vertically right in the middle to align precisely with the solar panels shape. The second smaller template was used to create the small rectangle shapes and the third one for the black dot in the middle of the panels. I then liberally spread quantity of my little 'magical powder' all over the solar panels surface with my finger tip (it may not be very visible from the angles I took the photos, but under direct light, you would see a lot of sparkling. I used a pale blue sparkle powder I had got from an art store years ago for a totally different project. Some people may have noticed a did a small mistake however: the position of the solar panels grey triangles on the photos I took is wrong. They should be 'rotated' one step back on the whole panels. By the time I noticed the error it was too late, I had already painted a few and I didn't had enough blue paint left to redo the panels. I thought about correcting it by changing the position of the solar panel arms (the solar panels would then have been the reverse of what the real ones are: grey triangles on top of the ridges and white lines on the bottom. Not too important anyway, I will redo a set of solar panels later on eventually for new photos, but the most important end result is that the photos at least look good (from my humble opinion). |
First light
Member Posts: 85
From: Canada
Registered: Apr 2007
|
posted 04-02-2008 09:54 PM
I have just completed the artwork for the decals for the Orion CEV 606-C 1/48th scale kit from Stratosphere Models.Now I will be busy designing the instructions for the kit and the box art. I am going to order silicone to make the molds for the base this week as those were not made yet. There is still work to do on the avionics ring and a couple of molds I will modify somewhat. We are almost there! I will also post an update about new documents I have found which are fresh from this year. I have also started updating my website and adding the new pictures there. 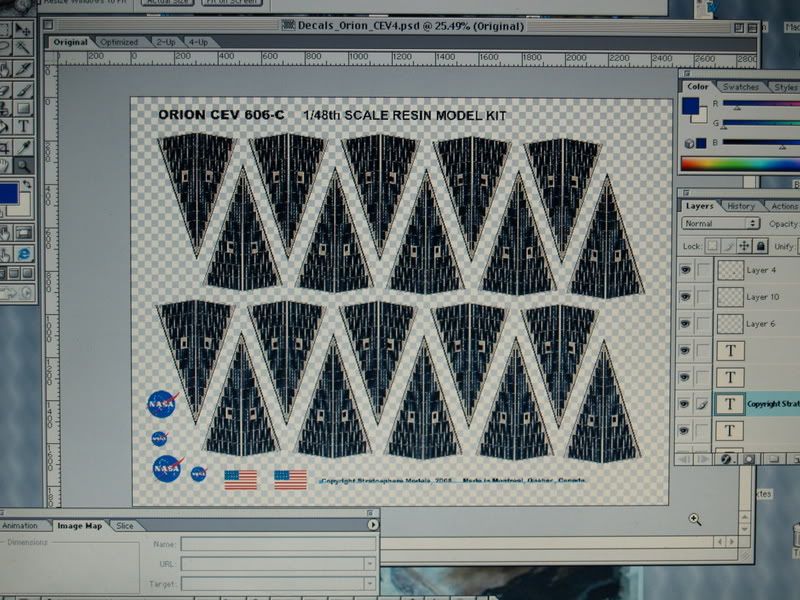 |
First light
Member Posts: 85
From: Canada
Registered: Apr 2007
|
posted 04-06-2008 09:07 AM
I am going to make more space on the decal sheet so I can add more details, such as a marking for the EVA door (I have too many NASA logos, there is only one NASA marking and one flag visible on the CEV, but I added them for decal test and trial). I may add a myriad of small decals for the heat shield tiles, I will see, maybe most people will assemble the CM permanently and then they small tile markings will not be visible.I am completing the written instructions for the kit (I will have to shorten them to six pages). Next I will see if I will use drawings or photos for the instruction sheet. |
First light
Member Posts: 85
From: Canada
Registered: Apr 2007
|
posted 04-28-2008 06:17 PM
I have completed the design of the interior of the avionics ring and its back side, which consisted mainly of gluing the top of the propellant tanks in place, covering them with metal crinkle foil, and thicken the backside of the ring and give a floor and side walls to the tanks.This weekend, I have cast the last molds for the CEV Orion spacecraft: the avionics ring mold itself and a few smaller duplicate molds for the auxiliary rocket engines, etc. I am now going to make the molds for the base of the model and start castings the kits later this week. |
First light
Member Posts: 85
From: Canada
Registered: Apr 2007
|
posted 05-08-2008 04:57 PM
A first casting of the avionics ring completed: The completed base (sorry if the pictures are a little dark, more bright they would wash out the details on the white parts): 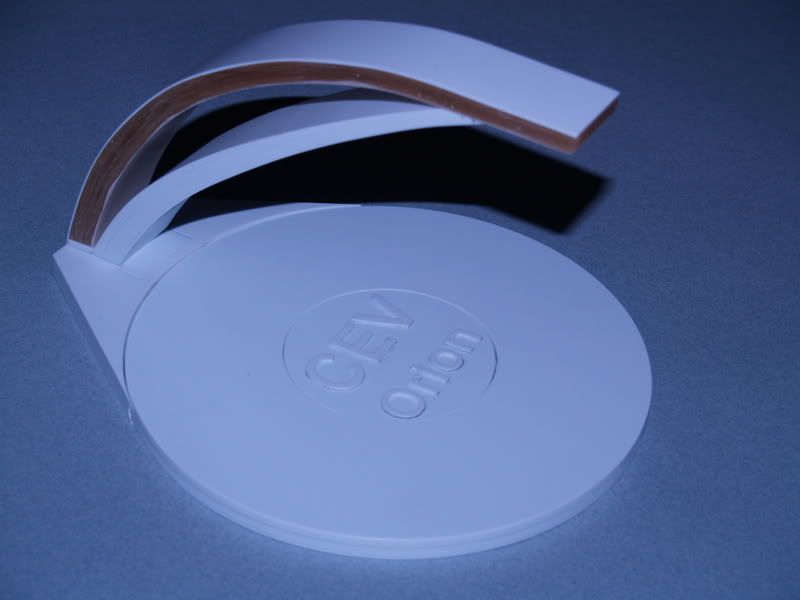 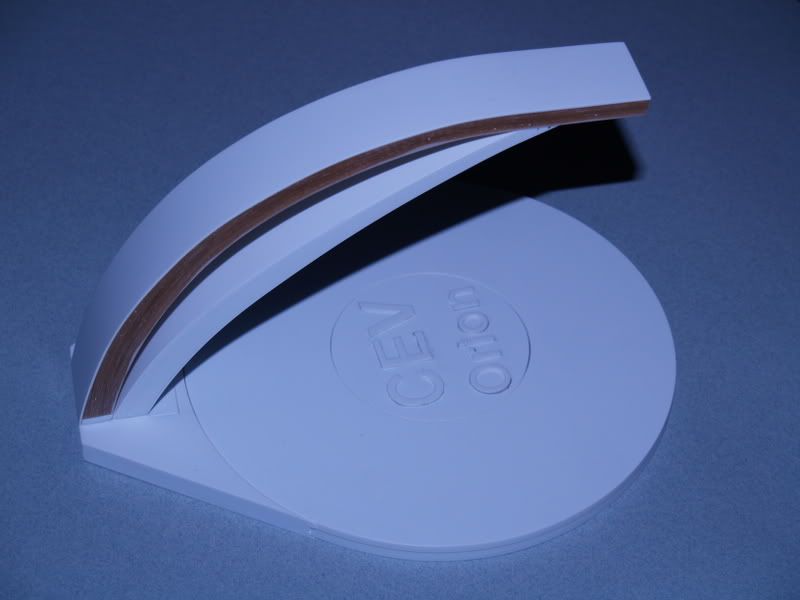
|
First light
Member Posts: 85
From: Canada
Registered: Apr 2007
|
posted 05-08-2008 05:29 PM
The Orion CEV parts are now in production :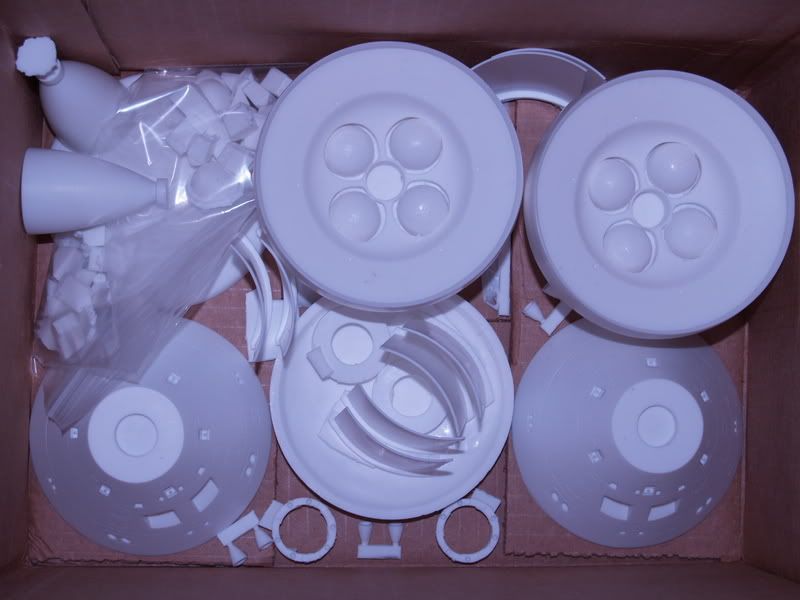 More parts: 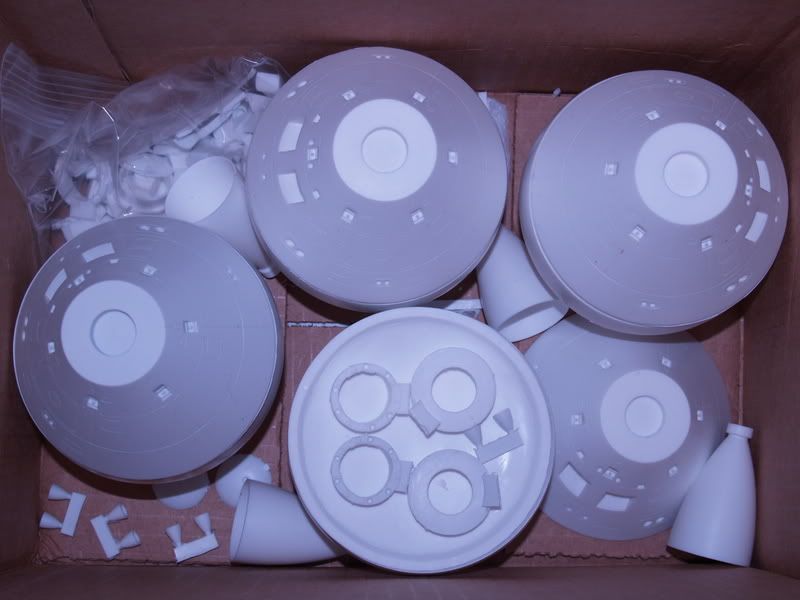 I have been busy this weekend making castings. More are coming. |
First light
Member Posts: 85
From: Canada
Registered: Apr 2007
|
posted 06-02-2008 10:31 PM
The base is now complete, I have added a bevel to the side of it, which was what I was planning since the beginning but had not dared doing so far by fear of damaging it (remember, this was added after the base was done and the part was not put into a lathe to do this latest modification). Well, I've found a new use for my 'circle-scribing-machine' and I added the bevel, and it turned out beautifully. This now adds some level of detail to the base.  |
First light
Member Posts: 85
From: Canada
Registered: Apr 2007
|
posted 06-02-2008 10:51 PM
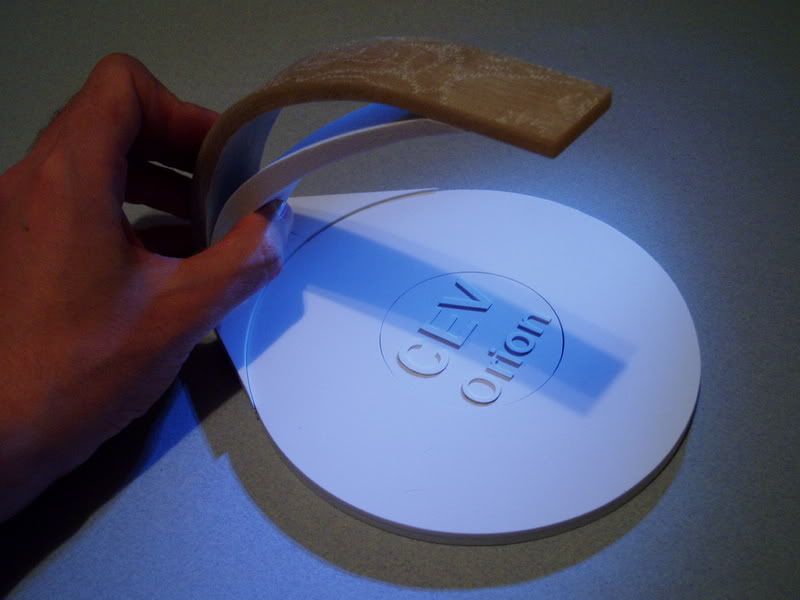
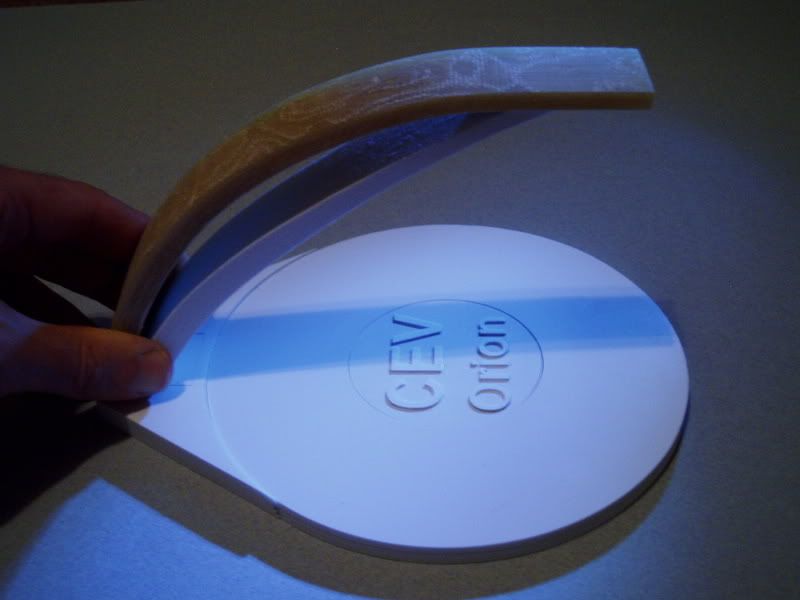
This is the new part I have decided to add to the base of the Stratosphere Models CEV Orion kit.This is a slighlty hemispheric disk that represent the Moon which is a special extra option that allows my clients to customize the kit some more. The disk of the Moon will be cast in translucent resin which can be lighted with a small LED and a watch battery, making the model and the base stand out more and adding a little spectacular effect to it. The standard disk featuring the CEV Orion raised letters will also be cast in translucent, tinted resin which can be lighted from behind (the color will be blue). So now, modellers will have 3 choices of customization of their base for the model, the two translucent disks with the Moon and with the name of the kit, and as both of them are interchangeable (if it is not glued in place it is easy to change it for the 2nd decorative disk when you want to give the base a different look), or the peel-and-stick picture of the Moon which will be provided and will cover most of the surface of the base. These two optional resin parts are only available to my pre-order customers. For the standard production version only one of them will be provided with the kit. So to anyone who still wants to pre-order before I finish the castings of the base, this is your chance to own that special custom part, you can still have those two special items included with your kit. I will sell the 2nd disk separately as an option to the clients who will buy the kit after the pre-order period (which is coming to end soon, as I am finishing the last molds). The base will also be available as a separately as an option for other kits that are already available from Stratosphere Models and for some future kits as well. 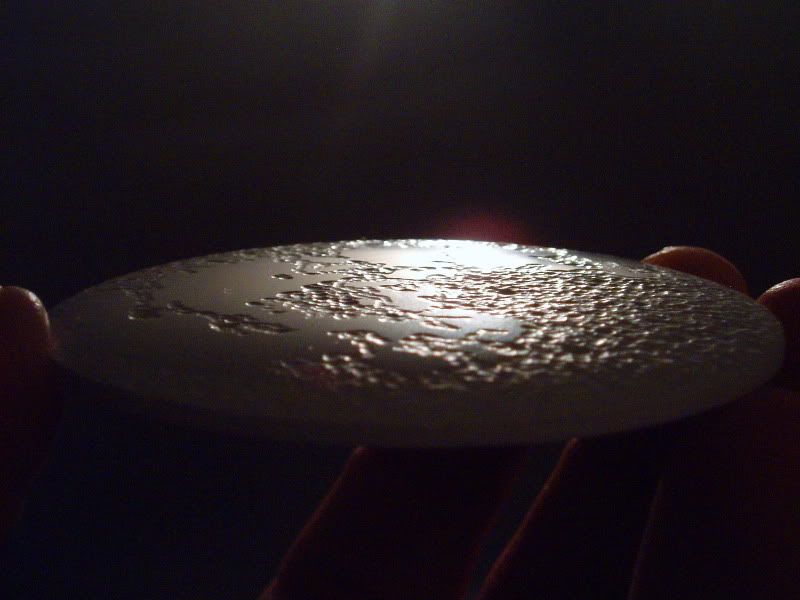 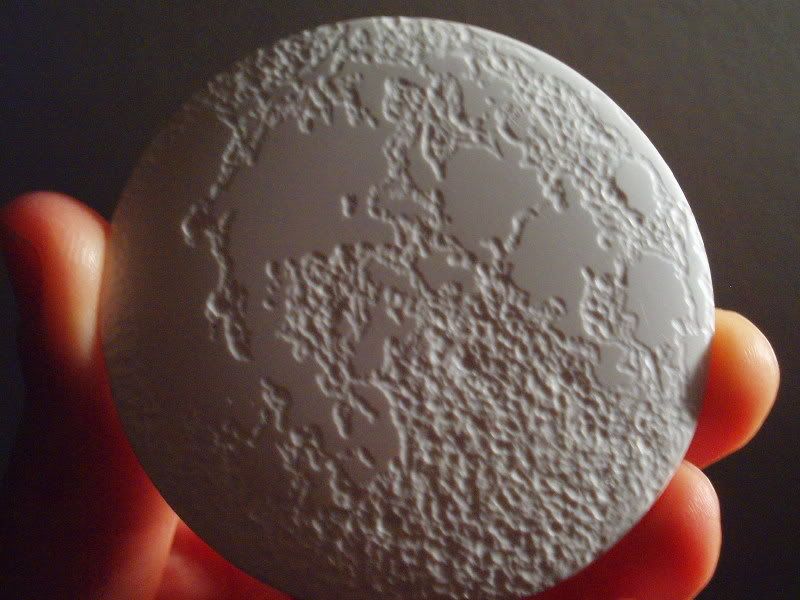

|
First light
Member Posts: 85
From: Canada
Registered: Apr 2007
|
posted 06-02-2008 11:08 PM
Here it comes!Here are preliminary pictures of what the Orion CEV kit from Stratosphere Models will look like with its base and with the translucent Moon disk, lighted! I will take better pictures tomorrow (I am gluing the kit parts once more to show it in a more complete form and to remove all that tape from the photos and get a better shot with a better background). I have cast the translucent disk with different colors and found out that the orange Moon (similar to the Automn Moon or to a lunar eclipse) shows the contrast between the seas and the cratered areas better. You will only need to add two or three powerful white LEDs and small watch-size three volt batteries (one for each LED), and you'll have a very special lighted base with the Moon seas and craters showing. I have started to cast the bases for the kits, this is one of the first samples, I cast it a dark charcoal color, I have got half of the bases cast so far and I am making more bases this week. 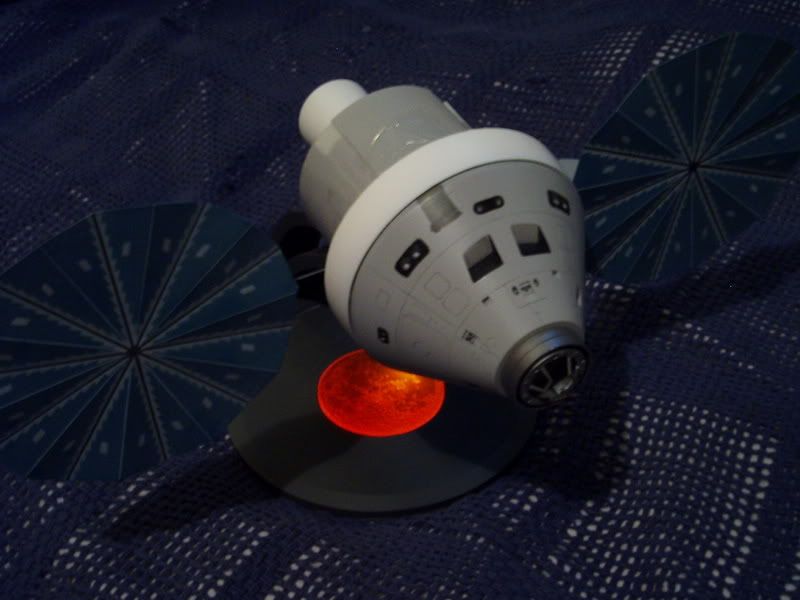 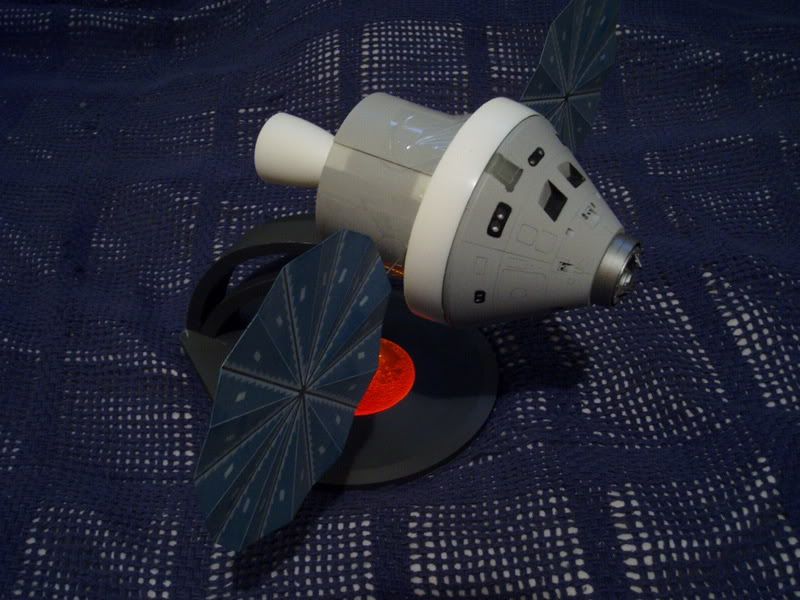
The kits that have been pre-ordered will also come with another translucent disk, featuring the name of the kit, so you can swap both of them to customize your base. Also, they will include one large stick-and-peel picture of the Moon, that can be used to decorate the base (instead of the translucent rings). Those special custom parts will be included with the kits ONLY for those who have pre-ordered the kits. Since I am still casting bases to complete the pre-ordered kits this week, this is your last chance to get those special custom parts at a lesser price! Once I start the regular production run (I am already stacking kits) those special translucent rings will be sold separately as 'add-on' parts for the kit. So, hurry up ! This week is the last chance to get those special exclusive parts included with your kit. |
First light
Member Posts: 85
From: Canada
Registered: Apr 2007
|
posted 06-04-2008 11:13 PM
Close up view of the translucent lunar disk for the Stratosphere Models CEV Orion 606-C 1/48th scale kit.I have decided to make it standard part of the production Orion CEV kit (the 2nd translucent disk featuring the name of the kit will be the part that will be sold separately). So now, everyone will be able to get the Moon disk as standard part of the kit, including people who were not part of the pre-order offer. I found out that the craters and seas show up with way more contrast when I turn the disk upside down (as seen here) (convex part down). The effect if particularly spectacular and noticeable even with room lights on.  |
First light
Member Posts: 85
From: Canada
Registered: Apr 2007
|
posted 06-04-2008 11:16 PM
The updated, higher quality pictures of the model kit. I used pre-tinted castings for the main engine and auxiliary engines to save time so I would not have to paint them for the new photos. The avionics ring is unpainted.The lighted Moon disk for the kit's base is now officially an integral part of the production kit (not just for the pre-order clients). The pre-order clients however will get an additional translucent disk featuring the name of the kit and the peel-and-stick photo of the Moon.  
|
First light
Member Posts: 85
From: Canada
Registered: Apr 2007
|
posted 09-18-2008 01:00 AM
 I have now made another version of the decorative translucent Moon disk for the Orion CEV kit available. The new Moon disk is tinted yellow and as you can see from the picture, it does look as neat at the orange one, and shows good contrast. I am making it available with the kit and you now can choose it when you buy your Orion CEV kit: with the orange Moon disk or with the yellow Moon disk. 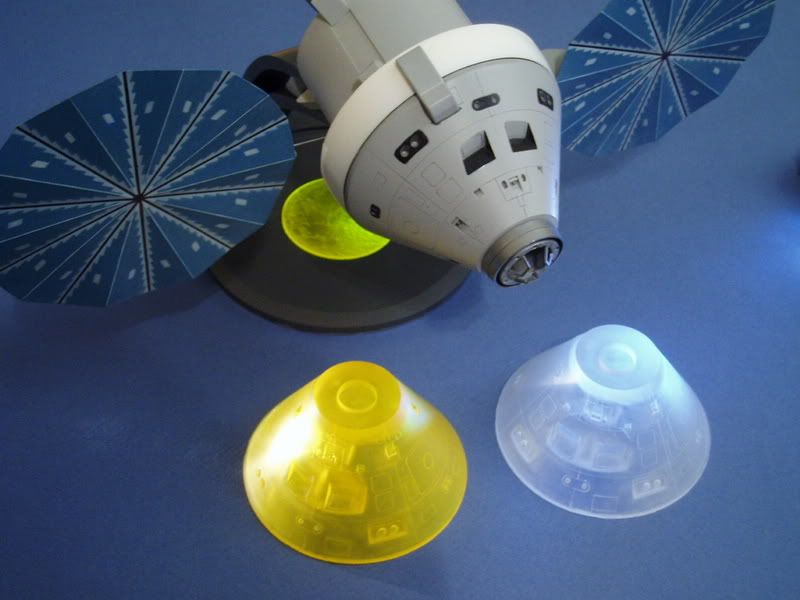
I am also now offering a new version of the CEV Orion kit which include a transparent Command Module, so you can light it from the inside!! The new version made with a special transparent resin (which I can make transparent or tinted, per request) allows you to install white LEDs inside to illuminate those windows and make for a more striking model. I can also provide the model with a transparent main rocket nozzle, so you can light the engine too! (Note: the standard CEV kit version with opaque CM will also continue to be available, at the same time as the transparent CM kit version). |


